
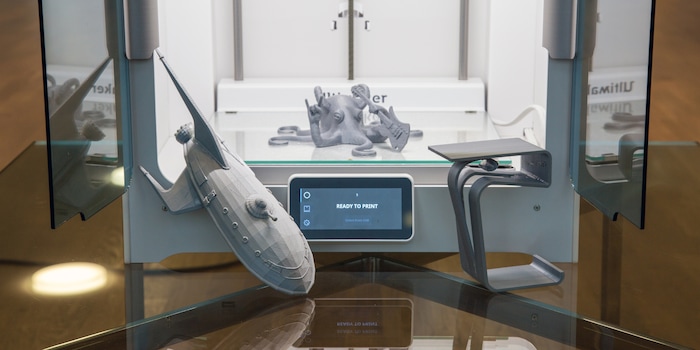
S5: A field report with the new 3D printer from Ultimaker
Ultimaker is expanding its range with the S5. The desktop printer offers a larger build space than the manufacturer's other models. I spent two weeks testing whether it can match the high quality of the smaller models.
Yay, I get to test a 3D printer! What should I print first? I'm so full of ideas, I don't know what to do. Maybe the brilliant idea will come to me during commissioning. I carefully fit the nozzle into the print head. Incidentally, the Ultimaker comes with three. Two AA nozzles with 0.4 mm for printing filament and a BB nozzle with 0.4 mm for PVA support filament.

Easy to get started
Once everything is assembled, I follow the printer's instructions on the touchscreen. In addition to the larger build space, this is another distinguishing feature compared to its little brother, the Ultimaker 3. Naturally, I update the firmware so that the printer is up to date. Then I can finally start printing, I can hardly wait. The restart after the update takes a bit too long. What's going on? I choke the printer and restart it. It gets stuck again during the boot process.
A call to Ultimaker support sheds light on the problem. My test device is part of the first delivery and has a faulty firmware. Instead of the Ultimaker S5 firmware, it had installed the Ultimaker 3 firmware. It's clear that it doesn't work. I wouldn't either if I suddenly had to walk around with my colleague Martin Jud's brain. Now I have to wait for the technician.
What can this thing do?
The Ultimaker S5 is an FDM printer with dual extrusion, an open filament sensor and a large build envelope. Incidentally, the "S" in the name stands for Studio. Ultimaker wants to appeal to creative people such as designers and architects with this printer. Ultimaker offers two build plates. One made of glass and one made of aluminium. The latter is particularly suitable for ABS and PC materials. Here you can find all the specs and here all Ultimaker 3D printers with specifications in comparison. I'll also list the most important ones:
- Printer size: 495 × 457 × 520 mm
- Maximum print size: 330 × 240 × 300 mm
- Diameter nozzle opening: 0.25 mm, 0.4 mm or 0.8 mm
- Resolution: 0.25 mm nozzle: 150 to 60 microns; 0.4 mm nozzle: 200 to 20 microns; 0.8 mm nozzle: 600 to 20 microns
- Supported printing materials: PLA, Tough PLA, Nylon, ABS, CPE, CPE+, PC, TPU 95A, PP, PVA, Breakaway
- Connections: Wi-Fi, LAN or USB
- Base plate: glass or aluminium (unfortunately not yet available when I tested it, but will be supplied when it is released)
If you are completely new to 3D printers, I recommend the following articles.
Now you're ready to get started
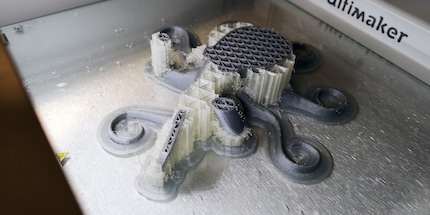
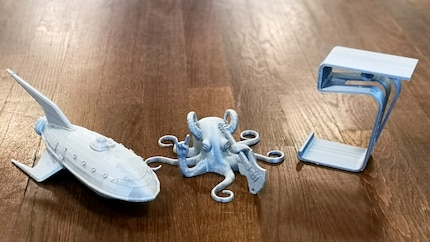
After a long weekend, the technician finally arrives and repairs the printer. Now I can get started. As I only have the printer available for just under two weeks, I decide to only print models that have already been created. The Death Metal Rocktopus is my warm-up. I don't listen to death metal, nor am I a fan of octopuses, except deep-fried on my plate. But this thing is so pointless that I just want to have it.
Calibrating
First, however, I have to calibrate the printer manually. Although the S5 has Active Leveling, Ultimaker still recommends performing a manual calibration every month. I'll come to active levelling later. First, I set the print head. I start the calibration via the touchscreen. This guides me through the process. After a minute, the print head is set.
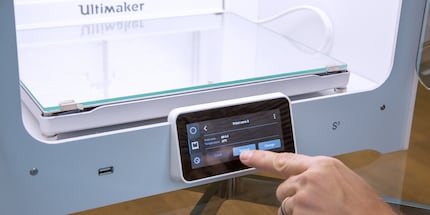
Next up is the printing plate. Here, too, the touchscreen guides me through the process. I have to set the distance between the pressure plate and the nozzle head. A little tip: if you press the virtual buttons for longer, the pressure plate moves up faster than if you tap it briefly. I adjust the front part of the plate using screws on the left and right side. After about five minutes, the build plate is also ready for use.
Pull in the filament
Now I can load the filament. I choose the supplied PLA for printing and the PVA as support material. I know that the Ultimaker S5 can handle many other materials. However, as the S5 is designed for studios, these are probably the materials that are used most often. For this reason, and because the aluminium plate - which is suitable for ABS - was not available to me at the time of testing, I also opted for PLA.
The automatic feeding of the filament doesn't work properly. Unfortunately, the filament is not pushed all the way to the nozzle. I try again and again and again. It doesn't want to work. So I release the latch on the feeder and push the filament to the nozzle by hand.
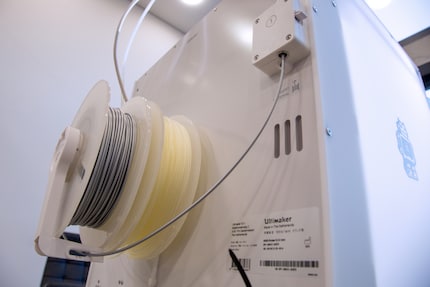
A practical feature of the filament supplied is that it is equipped with NFC. The printer automatically recognises the material and knows how much filament is left. It also warns you before a large print if there is too little material left. In addition, the correct temperature for printing is automatically set in the print programme. To benefit from these features, however, I have to use filament from Ultimaker. This is slightly more expensive than filament from third-party suppliers. But the convenience is worth it to me. I no longer have to worry about many settings during the print job and less things go wrong if I forget something.
Rocktopus
The printer is ready to go. Now I just have to give the print command. To do this, I download the free Ultimaker Cura software. I can use it to prepare the model for printing. I position the model in the printer, select the filament, set the print quality and choose other print settings. I leave the print size as specified. For this first attempt, I opt for the settings suggested by the programme. The print speed is set to medium.
All that remains is to slice the model and then send the print job. Before doing so, the Ultimaker S5 calibrates the build plate with active levelling. It does this before every print job. This automatic calibration is more accurate than manual calibration. Active levelling uses 42 points for the setting, whereas manual levelling only uses three.
The printer is now getting to work. My Rocktopus should be ready in just under 24 hours. I'm looking forward to it.
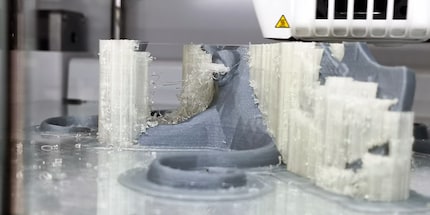
When I get to the office the next morning, the Rocktopus has already grown quite a bit. Unfortunately, one of the filament supports has broken. But that's no big deal, as I don't understand what it was made for anyway. Overall, however, I have the impression that the PVA was applied somewhat sloppily. Maybe it's also down to the material. When I unpacked the PVA, I noticed that the plastic was cracked. PVA should be kept airtight and in a dark place if possible. It quickly absorbs moisture and then becomes unusable for printing. Let's see what it looks like after printing.
Working next to a 3D printer is not pleasant. Not because of the noise emissions - I measured between 35 and 50 dB from half a metre away - or other emissions, but because I could watch the printing all day long. It's so fascinating and hypnotising. The constant comments from my colleagues are also unpleasant: "Now this thing is still printing?", "When are you going to finish?", "Are you going to print me XY?" Okay, somehow I secretly enjoy the attention, even if it's actually for the 3D printer.
After just over 25 hours, the Rocktopus is finished. That's almost an hour longer than Ultimaker Cura calculated before I started printing. Why the software was so far off the mark is beyond me. But never mind, 3D printing is more about quality than speed.
Unfortunately, I won't be able to get an idea of the quality until Thursday, as I have to catch the train. It's Tuesday and I actually wanted to do another print job before I go home. Now I have to wait until Thursday because Wednesday is my day off. I have so much to print and I'm running out of time.
Interim conclusion
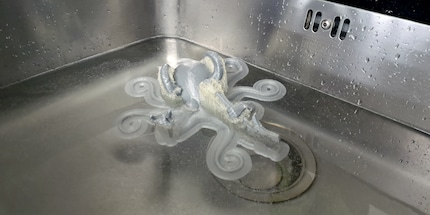
On Thursday, the Rocktopus is ready. I realise that the quality is quite impressive. At least what I can see so far. First I have to remove the Rocktopus from the glass plate and remove the support filament. The octopus can't really be moved. I'm a bit worried about the tentacles and don't want to break them off. That's why I put the glass plate with the Rocktopus in the freezer for 5 minutes. After that, it's very easy to remove.
Now I just have to remove the PVA. To do this, I put the Rocktopus in water heated to 35 degrees. The PVA is easy to remove at first. But it is very difficult in the narrow edges. I use a toothbrush to help me get into the tight spots. After about half an hour, I am reasonably satisfied with the result. But there is still some PVA residue. Let my colleague Raphael Knecht take care of it. He gets the Rocktopus after the test.
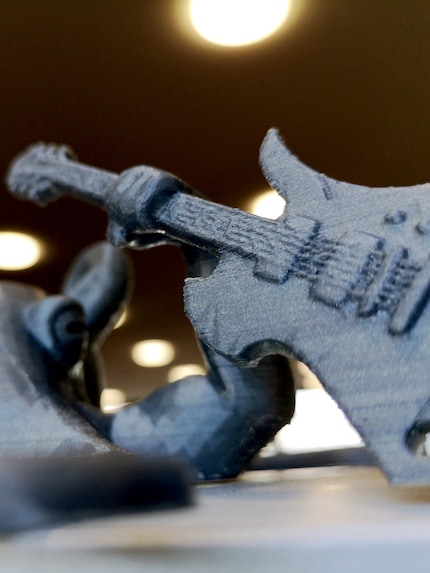
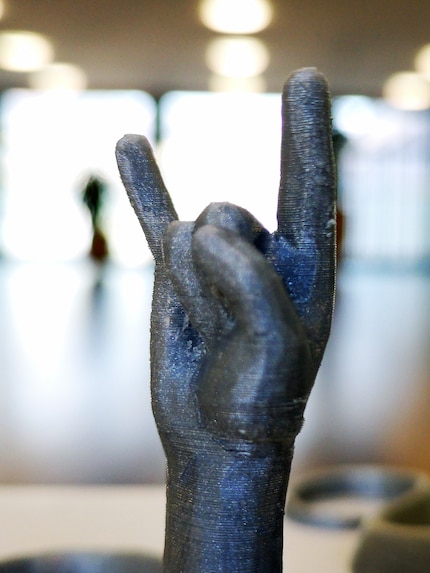
Other than that, the Rocktopus makes a very good impression. I particularly like the structure of the guitar. The strings are shown to their best advantage and I also like the head with the tuning machines. Even though I only printed on medium settings.
Headphone stand or Bessi instead?
Instead of testing the quality now, I first want to see how the Ultimaker performs at a higher layer thickness, i.e. lower print quality. To do this, I'm printing a headphone stand. My colleague Livia Gamper has been bugging me about this for a while now.
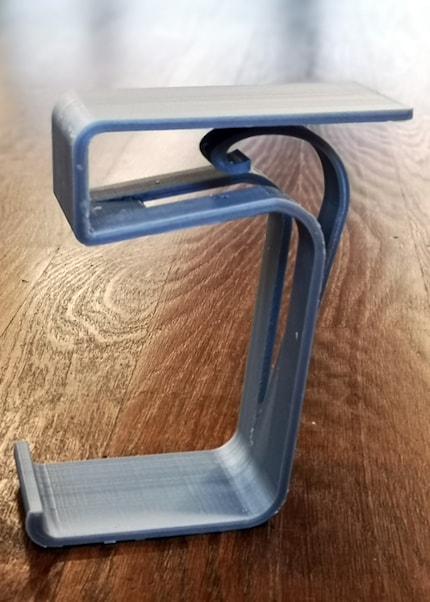
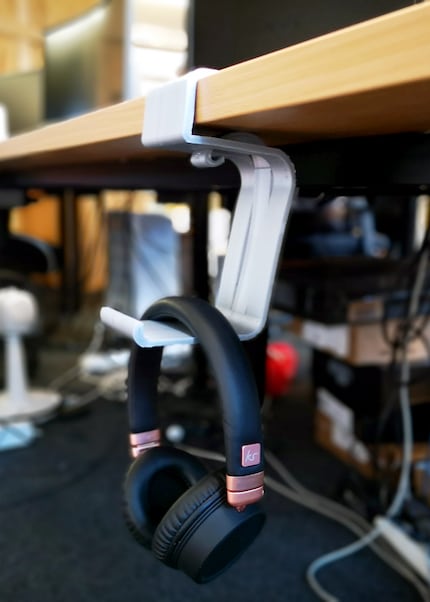
Once again, I download a model. Livia and I decide in favour of a simple stand that can be attached to the table without any additional material. I find the "spring", which is supposed to provide the necessary support, interesting. Somehow I have the feeling that ABS would be more suitable here than PLA. But the designer also printed with PLA. I'll just give it a try now.
Unfortunately, like at the beginning, I have bad luck. The printer breaks at some point in the first half. I don't know exactly when, as I'm no longer in the office and unfortunately I can't monitor the printer remotely due to our wifi situation in the office. That would be a brilliant function, by the way. The printer has an integrated camera and I could monitor the print at any time using the app or Ultimaker Cure. It would also report problems to me. It's a shame I wasn't able to test this.
The next morning, I find the unfinished headphone stand in the printer. It reports an error with nozzle number two. Apparently it couldn't be heated properly. The Ultimaker Troubleshoot recommends replacing the nozzle in this case. But I don't want to go that far straight away. Maybe it's not defective at all and a software problem has caused the cancellation?
I've been using the printer for four days now and I've only finished one model. That's pretty frustrating. But anyway, as it's Friday, I decide to postpone printing the headphone stand. It won't be finished before I leave for the weekend. And I want to print a longer job over the weekend.
Bessi first then
Fans of Futurama will probably already have recognised it from the cover picture. I'm printing the Planet Express spaceship Bessi - in oversize. It will be over 30 cm long. I'll take a chance on the defective nozzle now, I'm still in the office for a few hours and will notice if something doesn't work out.
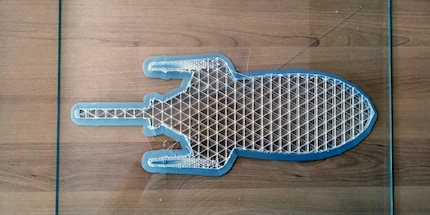
After three and a half hours, it's ready again. This time, the Ultimaker S5 reports a different error. But it has to do with nozzle two again. The printer cannot measure the temperature correctly. So the nozzle does indeed seem to be defective. I order a new one. But it doesn't arrive until Monday. Again, I have to be patient over the weekend.
My stubborn head doesn't want to wait that long. So I remove nozzle two and put it back in. Perhaps it was no longer correctly attached to the print head. I start the printing process again. After a few hours, I get the same error message again. So I remove the nozzle head again. Incidentally, I do this using the touchscreen and its instructions so that I don't break anything. Interestingly, I get the same error message again when I remove the nozzle. Hopefully the whole print head is not defective. Then my test would be over.
But now really Bessi
I still have five days left with the Ultimaker S5. The nozzle finally arrives on Monday afternoon. After installing it, I start printing Bessi again. I set the layer thickness to 0.4 mm. The quality of the print isn't as good, but it only takes one day and seven hours. That'll be enough for the headphone stand on Thursday.
Tuesday morning I am pleasantly surprised. The print is still running. It was probably actually the faulty nozzle. Unfortunately, I won't see the final result until Thursday as I'm off work on Wednesday. I can actually look forward to Thursday morning. I finally have a complete model from Bessi.
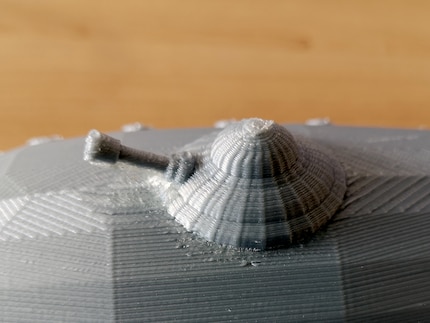
I'm pleasantly surprised by the quality despite the 0.4 mm layer thickness. The cannon on the top really stands out. The fact that the layers are recognisable doesn't bother me given the size of the print. If I have time, I will also remove the remaining support filament, which can be seen in the image below.
Headphone stand
The printer will be picked up in 24 hours. Now I have to step on the gas. Fortunately, printing the headphone stand with a layer height of 0.4 mm should only take a little over ten hours. Let's see if it works now.
On Friday morning, I was actually able to remove the printed headphone stand from the Ultimaker S5. Once again, the quality is impressive. And despite the PLA, the stand can be attached to the desk without any problems. I'm thrilled and also a little jealous of Livia. I would have loved to have printed a stand like this. Maybe next time.
Conclusion
On paper, the Ultimaker S5 leaves nothing to be desired. My first practical experiences, apart from the glitch with the firmware update, were also very positive. The print results and speed are good. The handling via the touchscreen and Ultimaker Cura leaves nothing to be desired for me.
The two extruders open up ingenious printing possibilities. Even 3D printing novices like me can print complex structures. I would have loved to print with ABS. It's a shame that Ultimaker didn't have the aluminium plate ready at the time of testing.
Unfortunately, the fun was somewhat spoilt by the quality of the BB nozzle for PVA. Ultimaker calculates a service life of around 2000 printing hours per nozzle. I never achieved this in my test. I was probably just unlucky with the nozzle supplied. With the new one, I was able to print Bessi and the headphone stand without any problems. However, as I have to return the printer after two weeks of testing, I can't make a final judgement.
I will definitely miss the printer. I now have ideas for 3D prints that are actually useful and not just dust catchers. If I had enough money, I'd buy the Ultimaker S5. Or I'd just apply for one for the editorial team 😁.
From big data to big brother, Cyborgs to Sci-Fi. All aspects of technology and society fascinate me.
