Dress rehearsal in Barcelona: The basics of video editing in Premiere Pro
Before the first press conferences start today, video producer Stephanie Tresch and senior editor Dominik Bärlocher put their equipment through its paces one last time. They also wanted to know how the change in front of and behind the camera can be further expanded,
"How quickly can you edit a video?" video producer Stephanie Tresch asks me.
"No idea," I reply over breakfast in Barcelona. Oatmeal with protein powder. She's lying on the couch and blow-drying her hair. We slowly get ready to explore the city. The sun is shining outside, but it's dark and cold in here.
The idea: we'll use both laptops we've travelled with as cutting stations and, as I usually write faster than she edits, I'll do rough cuts. Then she will do colour grading and sound editing and both laptops will render video. Rendering should go while I write.
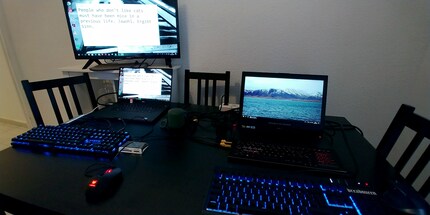
The editorial team in Barcelona
That's too many unknowns for our liking, because as of today it all has to be in place.
In the course of this main rehearsal, we want to show you what goes into a simple video and explain the basics of video editing: Editing.
Footage where there is none
I can edit videos. Rough cuts work quite well. A few weeks ago, when Stephanie and I were visiting a dominatrix, I edited the second video - the one with the conversation - while the video producer checked every frame of the portrait video over and over again. Portraits are important.
We decide that we want to test this: How quickly can a journalist who teaches himself Adobe Premiere Pro through self-study cut a short video?
"But we don't have any footage that I could edit," I say.
"Then we'll just make a video with lots of cuts."
The idea comes from a video that we recently rediscovered in Zurich.
The protest from 2012 is quite effective in terms of video technology, but simply made, but quickly and entertainingly edited.
We decide to make a congratulatory message using a similar technique.
The recipe
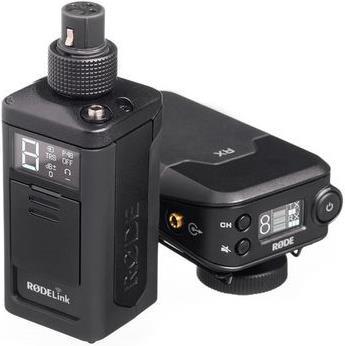
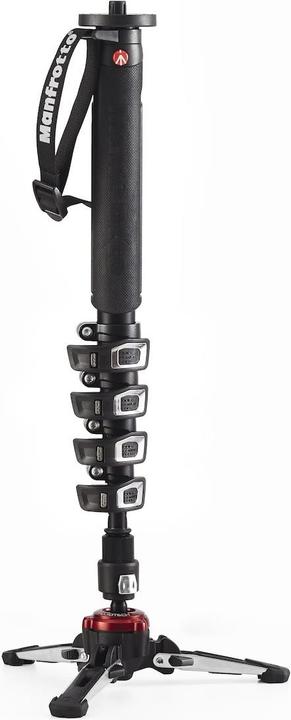
Such a video is easy to make and the finesse lies above all in the preparation. The equipment can be anything from a smartphone to a professional camera. In the video, you can see a Rode microphone, which is usually attached to the top of the camera. The camera is on a tripod, probably on a table. One of the journalists has a very hunched back. Or he is sitting. We therefore assume the following setup:
Any camera with a 3.5mm jack plug that was on the market in 2012. Canon, Nikon, Sony, something like that.
We are forced to adapt because we don't have the resources in Zurich.
In addition, a Sennheiser MD-46 microphone.
The highlight before the shoot
The most complex part of a video like this is the preparation. Because the text has to be right. It has to be scripted. Otherwise, an editor can't cut word for word, but has to somehow piece stuff together and the video doesn't look as coherent as it could.
In general, Stephanie advises that every shoot should be prepared in as much detail as possible. This ensures that the result "makes a good trap". So she sends a short congratulatory message to a friend. Because she misses her birthday every year as she is in Barcelona at the Mobile World Congress.
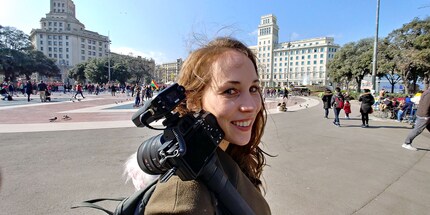
In the meantime, I'm looking for sights that we can shoot in front of. In a video like ours, the backdrop is at least as interesting as the foreground. There should be something to see of Barcelona. The fewer people, the better. Google Maps to the rescue.
The shoot and the edit
The shoot is simple: we take the bus and metro through the city, Stephanie stands in front of a landmark and speaks the text.
Back in our rented flat, I get to work. I copy the video files from the camera to a hard drive and import them into my Adobe Premiere Pro Project using drag and drop. I drag a file from the library of imported clips at the bottom left of the screen into the timeline at the bottom right. If the programme asks if I want to adjust the settings of the sequence to the clip, I say "Adjust". Now you're ready to go.
I work a lot with keyboard shortcuts, which is why I will address all the tools here with these.

The C button: The C stands for Cut and the razor blade indicates that the cutting tool is activated.

The V-button: Use it to move sections back and forth in your video.
All your work takes place in this window at the bottom of the screen.
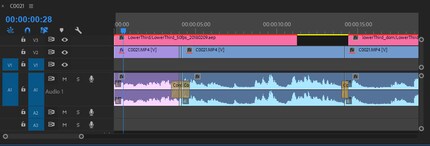
Furthermore, you must be able to move the marker. So the "The marker". It's apparently called that. I'm sure there's another technical name in there, but "The marker" does it. You move it by either dragging the thick part around at the top of the bar where the thicker part of the line is, or by simply clicking anywhere on the bar at the top.
The work here is actually quite simple, but the pitfalls lie in the details. Essentially, it works like this:
- Locate the frame on which you want to cut
- Place the marker there
- Press C
- Click on the selection
Your clip - this is what a video file is called when it is edited in Premiere Pro - is now two clips. You will no longer need one of them.
- Press V
- Highlight the clip you no longer want
- Press the "Delete" button
The unwanted clip has now disappeared and you only have footage that you actually want to see. However, to ensure that these are at the beginning of the sequence - the name of the construct of clips that you are building - you have to move them to the right place on the timeline.
- Click on the clip you want to move
- Drag and drop it to where you want it
- Attention: If you drag a clip onto another, already existing clip, the existing one will be overwritten
That's all the science behind a simple edit. But maybe the cut isn't pretty enough? Then you need to dig deeper.
Zoom Zoom
To help you find the perfect frame for the edit, I highly recommend using the zoom function on the timeline. If you are in the general area of your frame for the edit, then zoom in.
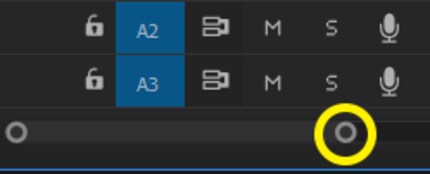
The zoom bar can help to precisely isolate individual frames
You can do this by dragging the circle icon at the bottom of the scroll bar to the other end of the bar.
If your view is large enough, you may be able to see your cut frame a little better. Not in the image part, but in the sound. It always helps me a lot if I can see where a spoken word begins and ends in the bar. That way, the cut frames almost create themselves. At least with jump cuts like in the video above. If you want to fade to black, like at the very end, then leave a few frames at the end and fade to black.
A little showmanship at the end
That explains the science behind this video, at least in the basics. A lot of cuts and a fade to black. As this fade is a technique that is often used in the film world, Adobe was kind enough to make it a standard effect
.
To get to the effects, you need to adjust your workspace. Premiere Pro has these workspaces because the user interface would become incredibly complex and complicated if all the functions were placed on one screen.

- Switch to the Effects workspace by clicking on "Effects"
- Wait until the workspace is loaded
- All standard effects are stored in the Effects panel on the right-hand side of the screen
- Enter "dip to black" in the search field at the top
- Drag the only effect that is still displayed to the end of your clip
Do you also want the sound at the end as a fade out? No problem. The only problem is that there is no effect called "Fade Out" in Premiere Pro, for whatever reason. In Premiere Pro it's called "Constant Power". The application works exactly the same as before, with the one difference that you have to drag "Constant Power" onto the audio part of your clip.
So, that's it. You can now create a simple clip with lots of jump cuts and a fade out. In the end, it will look like this.

The video is ready for export
And by the way: Happy Birthday, Becci.
Journalist. Author. Hacker. A storyteller searching for boundaries, secrets and taboos – putting the world to paper. Not because I can but because I can’t not.
Interesting facts about products, behind-the-scenes looks at manufacturers and deep-dives on interesting people.
Show all


