
Background information
My CNC adventure: A failure in three acts
by Kevin Hofer

My first steps with my own CNC milling machine were anything but successful. I went on a course to get help.
Saturday morning, eleven o'clock, in the Fab Lab Zurich. Myself and five other participants are spellbound as we watch the CNC milling machine mill a hemisphere. As a layman, it's great fun for me to watch such a big machine. But I'm not here to watch, I'm here for a milling course.
A reminder: I'm taking part in the course because I milled into the building board on my first attempt.
A Fab Lab is an open workshop. It gives private individuals access to modern industrial production equipment. There are already several fab labs in Switzerland, and the number is growing. This page tells you where to find them. You are only allowed to use certain machines after you have completed a course. This is also the case with the CNC milling machine at Fab Lab Zurich.
In the course, I first learn how to create cutting paths in RhinoCAM. CAM stands for Computer Aided Manufacturing. In the CAM plugin for Rhinoceros - the CAD programme used in the Fab Lab - I give the CNC milling machine information about the raw material and the milling processing steps.
Privately, I won't be working with RhinoCAM. I rely on Fusion 360 CAM because it's free. Nevertheless, the course provides me with important information on what I need to look out for when working with CAM software.
In the course, we start by importing a test part. After the import, it is important to define the X, Y and Z axes. This way, the milling machine knows the orientation of the model. Then I have to specify the dimensions of the stock, the raw material. This tells the milling machine what kind of object it has to mill the model out of. I didn't realise this, but it makes sense to me now. The milling machine can't know what's going on in my head, so I have to explain everything to it step by step.
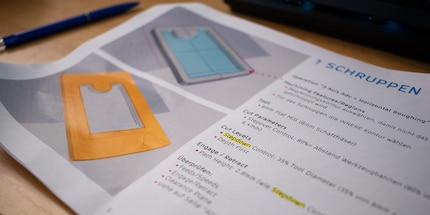
Then I define the milling processing steps. The test part is milled in four steps. The first step is roughing. This is followed by finishing, engraving and profiling. During roughing, the contours of the model are roughly milled out. These are refined during finishing. I then engrave the Fab-Lab logo and, last but not least, I cut the model out of the raw material.
I have to make certain settings for each work step. Firstly, I define which regions or properties the milling machine should process. Then I specify which milling cutter is to be used for the work step. It is important to record the tool exactly. Fortunately, this has already been done in the Fab Lab. At home, I have to record all my milling cutters in CAM. That may sound tedious, but I'm looking forward to it. It's the only way I can work properly.
After that, I have to make settings for cutting parameters, cutting depths, speeds and much more. Here too, it is important that I enter all the information correctly. The settings can vary depending on the material and the desired result. I make different settings for all four work steps. I'm realising more and more that the line between success and failure of a milling job is very small. Great, I love challenges like this and look forward to overcoming new obstacles with every future project.
After that, I prepare the file for the postprocessor. The post-processor converts my results from RhinoCAM into a CNC format.
After all the theoretical work, I can finally get to the machine. I fix my raw material to the sacrificial plate with clamping devices.
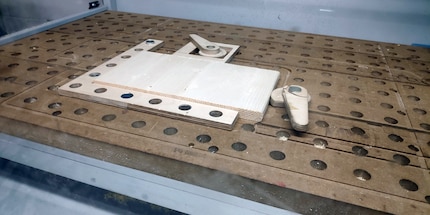
Then I first set the zero point of the X and Y axes using the CNC controller. For the zero point of the Z-axis, I proceed in the same way as with a 3D printer. I place a piece of paper on my raw material and lower the milling cutter. As soon as I can no longer move the paper, I fix the zero point.
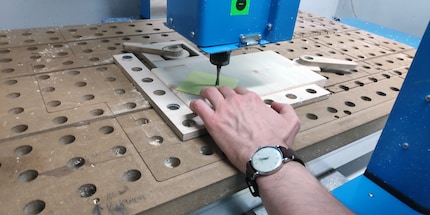
After that, I start the milling job and monitor it.
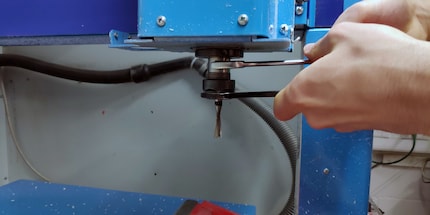
I change the tool twice for the test part. I use an end mill for roughing and cutting, and a ball nose end mill for finishing and engraving. As I have entered the work steps in RhinoCAM, the machine pauses after roughing and I can clamp the end mill. After finishing and engraving, I mount the ball nose end mill again for cutting out.
After less than a quarter of an hour, my test part is already milled out. Great, this is fun. I can also see the results of my usual work, i.e. my online articles, but holding something solid in my hands is even better. Now I'm definitely hooked and ready to take the next steps with my own milling machine.
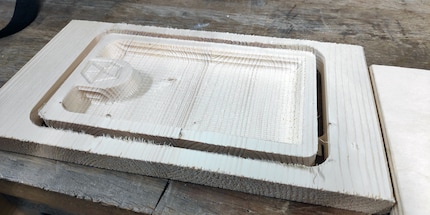
A CNC milling machine is great, but it's stupid. I have to feed it lots of precise data so that it knows what to do. Otherwise, what happened to me last time will happen: my milling job will fail.
Thanks to the course, I now know better which settings are for what. Now I have to learn what this means in detail for my individual projects.
Of course, I also asked my instructors specific questions about my projects and received tips. I practise with wood or polystyrene before I start acrylic milling and will soon be making modifications to my milling machine.
For my protection, I am building a housing for my machine. I already have an idea of what it should look like. My milling machine also has no limit switches. These are important so that the machine knows where the end points of the axes are. Without limit switches, the stepper motors can be damaged.
From big data to big brother, Cyborgs to Sci-Fi. All aspects of technology and society fascinate me.
Interesting facts about products, behind-the-scenes looks at manufacturers and deep-dives on interesting people.
Show all