
Guide
The sleeper PC project: one ugly duckling
by Kevin Hofer
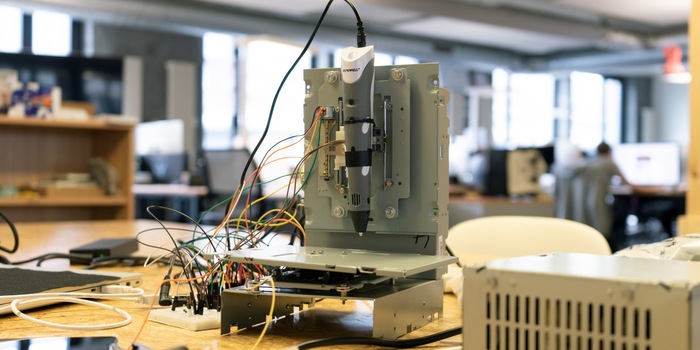
What do you do with old DVD drives? Throw them away? That would be a shame. I make a 3D printer out of them - or at least try to.
3D printers are great. Unfortunately, I don't have one of my own. So it just so happens that I can build a 3D printer from old drives. On Instructables, I came across instructions from gigafide. He makes the cheapest possible printer from recycled parts. That's exactly what I want to do.
Speaking of recycling: This is the last article in my Sleeper PC series. In this one, I'm building a PC in an old case with new components. If you missed the series, I recommend reading the first article. From there, you can also access the other articles in the series.
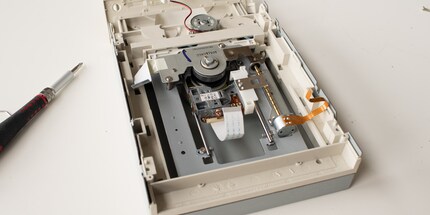
I need three old DVD or CD drives for the 3D printer. I still have two old drives from the Sleeper PC case. Fortunately, I can quickly find a third one. I also need three stepper motor drivers (more on this later), a PC power supply, an Arduino Uno, a plug-in board and a 3D printer pen. I still have lots of different screws and spacers from tinkering with Sleepy. I already have the Arduino Uno and PC power supply. The only things missing are the stepper motor drivers and the 3D printer pen. A friend of mine once ordered them in large quantities from China and gave them to me as a gift. Great, I've spent everything and nothing on them - at least not specifically for this project. So nothing should stand in the way of my tinkering.
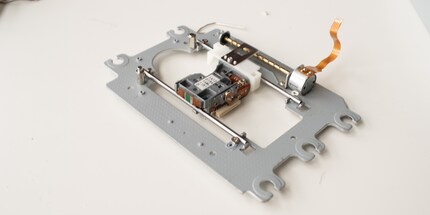
Firstly, I take all the drives apart. The three metal frames and stepper motors serve as the printer's X, Y and Z axes. Thanks to them, the printer moves. I solder four cables to the stepper motors so that I can connect them to the stepper motor later. Now that the three axes are ready, I have to attach them to a housing. I use those of the drives for this. That way they can also be used again. Cool, I can actually reuse everything.
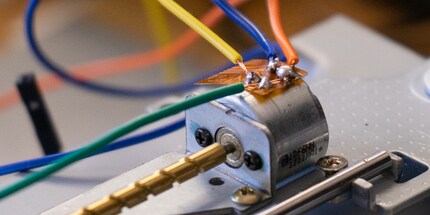
First, I mount the stepper motor of the Y-axis on a drive housing. This should move forwards and backwards. So I have to screw it on parallel lengthways. To do this, I drill four holes in the housing and screw in motherboard spacers. I screw the metal holder and stepper motor onto this. I also attach the lower plate of a drive housing to the carriage of the stepper motor. This plate acts as a building plate. However, I will have to put something on the plate for printing because it is uneven due to the screws.
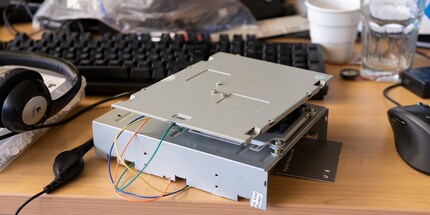
I mount the stepper motor of the X-axis parallel to the width of another drive housing. Unfortunately, I cannot use motherboard spacers here because they are not high enough. The metal mounting of the two remaining stepper motors is not the same as for the Y-axis. Instead of spacers, I therefore use four M4 x 16 millimetre screws. I push them through the housing from below and screw on two nuts at the top. These now act as spacers. This allows me to attach the stepper motor of the X-axis.
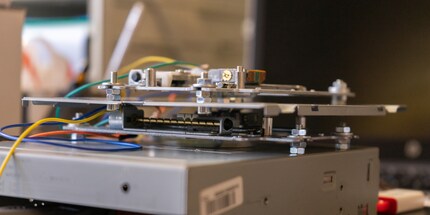
The Z-axis is still missing. To mount this, I use the lower plate of the drive housing. I screw the metal holder together with the stepper motor onto the plate in the same way as the other two axes. Again, I attach the plate at a 90 degree angle to the X-axis. To do this, I screw two screws from below through the X-axis slide and screw the plate onto it.
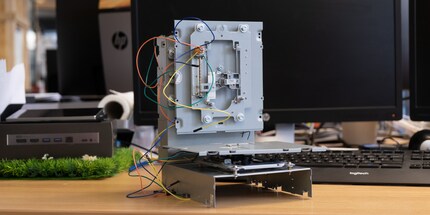
Finally, I have to attach the housing of the X- and Z-axis to the housing of the Y-axis. The 3D printer housing is finished.
I. Hate. Cables. And now I have to connect the stepper motors to the stepper motor drivers, Arduino and power supply. The drivers are necessary so that the Arduino can communicate with the stepper motors. I'll spare you the details of the wiring and just show you my finished work.
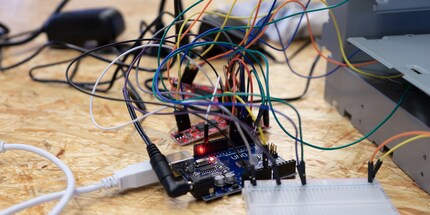
When the printer is running, I pull all the cables to the back and attach the Arduino, stepper motor driver and plug-in board there. But I don't want to get down to the tedious work (yet). If the printer doesn't work, I'll have invested a lot of time for nothing.
The 3D printing pen replaces the hot end, the nozzle and the drive of the printer. The pen heats the filament and presses it onto the build plate via the nozzle in a liquefied state. For this to work, I have to be able to control the propulsion of the pressure pen using software. To do this, I connect the button on the pen, which controls the propulsion, to the Arduino via jumper cables. This should then use the software to determine when the button is pressed and when it is not. The whole thing is more complicated than it sounds. If you want to know exactly how it works, take a look at the instructions from gigafide.
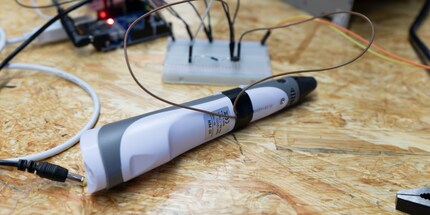
I will attach the pin to the slide of the Z-axis stepper motor later. But first I want to test whether everything is working so far.
Now I just have to load the Arduino with the CNC software "Grbl" and install "Grbl Controller" on the computer. Then I connect the software to the Arduino. It works! I can hardly believe it, I have a connection to my self-built 3D printer.
I immediately try to move the Z-axis. And it moves! Continue with the X-axis. It doesn't move. I can hear a noise from the stepper motor and have the impression that the axis is moving slightly, but not like the Z-axis. Is the X-axis blocked by something? No, everything should work without any problems. I'll try it with the Y-axis. Same game. What's going on?
I check the wiring. Everything is connected according to the instructions, it should actually work. After a long back and forth, I come to the conclusion that the stepper motors are probably defective. I may have damaged them when taking them apart. Bollocks. But I'm not giving up, everything works apart from the stepper motors. So my question to you, dear user: Do you have an old CD or DVD drive that you no longer need? If so, write me an e-mail and let me know, I'll be happy to take the drive off your hands. You can find the address by clicking on my name in the author profile. As a reward, I'll give you unlimited fame by mentioning you by name in a later article about the 3D printer.
By the way: You can still enter the competition to win the Sleeper PC today. Click on the first link below to find out how you can win. Good luck!
I will announce the winner next Tuesday.
From big data to big brother, Cyborgs to Sci-Fi. All aspects of technology and society fascinate me.
Interesting facts about products, behind-the-scenes looks at manufacturers and deep-dives on interesting people.
Show all