
Guide
What a stench: the Sleeper PC case
by Kevin Hofer

I'm giving away a Sleeper PC. But first, I'll have to put it together. You can even watch me do it. In today's update: moving the power supply and christening my creation
My project: to build a Sleeper PC. A PC with the newest hardware inserted into an ancient case for a comforting retro feel. I'll raffle this machine among all readers who manage to answer all my questions on the subject correctly. More about this at the bottom of the article.
Where am I at the moment? I got the hardware partly from manufacturers, the rest was sponsored by digitec. The 90s case arrived from Germany by post; I've gutted it to make room for new hardware.
Next step: cutting holes. Strictly speaking, only into the back wall of the Sleeper PC. I use a dremel to achieve this. Let's see how many fingers I'll still have when I'm done. In all honesty, I'm kinda scared. Or is it healthy respect, rather?
Speaking of which: I captured my little adventure with a milling machine and the dremel on video, just in case you want to be hypnotized by flying sparks.
90s and early 2000s cases have their power supply either at the top on in the middle. My housing has its slap-bang in the centre. I'll have to move it upwards.
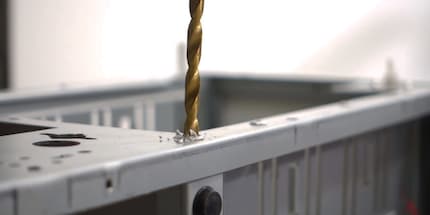
Another common feature of 90s cases is that many parts are riveted. So I can't just loosen screws and be done with it. I remove the rivets with a 4 mm metal drill. It's big enough to completely destroy the head of the rivets. This allows me to remove the power supply and 5.25-inch drive mount. I also have to remove the housing cover: it's in the way. After what feels like a hundred rivets, only the linking elements remain. Now I'm ready to «dremel» – well, almost.
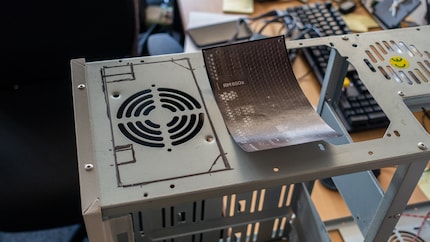
Before I start milling, I mark down where and how much I have to saw out. To do this, I make a template of the backside of the power supply and draw the contours onto the case. I can reuse the template for the screw holes later on.
Time to «dremel» I nervously mount a cut-off wheel. I turn on the multitool and get working. Sparks fly, the wheel quickly eats into the aluminium. Hypnotising. Unfortunately, I slip off course again and again, which leaves ugly traces on the metal. That's the dremel's downside: working metal precisely is difficult. This calls for some serious polishing. Fortunately, I'll spray-paint the entire construct at the end – how I plan on concealing any wounds.
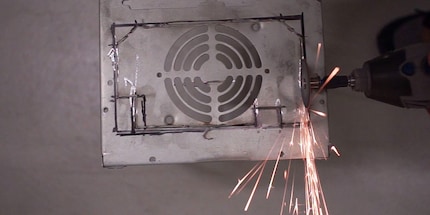
After about ten minutes and two burned cut-off wheels – which get used up over time – the new recess for the power supply unit is ready. It's not perfectly straight as I had to retrace a line. That's why I smooth I my cuts with a grinding attachment for my dremel. Not perfect. I would've had to work with a jigsaw or another tool right from the start. I know that now. Nevertheless, I'm satisfied with my first dremel job.
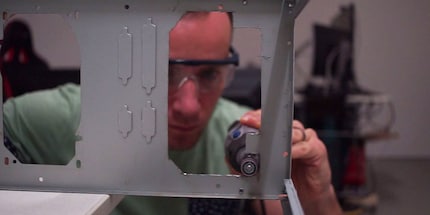
Next I attach the previously removed power supply mount at the height of the new recess. I drill the holes to attach the power supply using the template. After a few more tweaks, the power supply is in place. Next up, a screen for my power supply: I don't want to see any cables around my PSU.
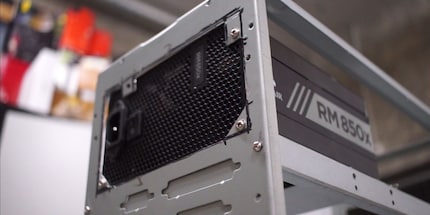
An aluminium cover would be cool, but I lack the experience and the tools. That's why I cut an acrylic glass panel to size – or more precisely: I broke it. Cutting acrylic glass is nearly impossible. To break it, I clamp the plate down between two pieces of wood, carve the side out several times with a box cutter and break it off using even pressure. At least, I try to.
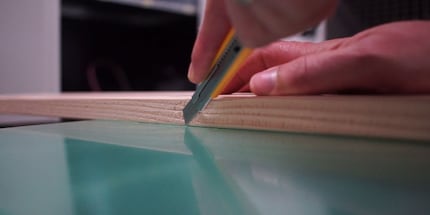
Unfortunately, the sheet doesn't break off on my first try, so I insert a new one. Even after several attempts the edge is not perfect – working with acrylic is more difficult than I thought. In the end, I take the piece that looks the best to me. I sand the edges with very fine-grained sandpaper.
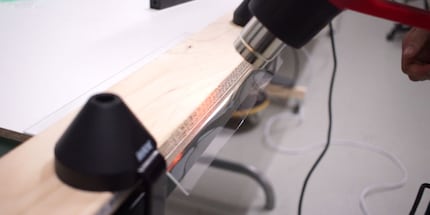
I want to bend the acrylic glass plate as well so that it can snake under the power supply holder. A much nicer design than just slapping on a straight cover for my power supply. I do this using a hot-air dryer because acrylic can be moulded relatively easily at a certain temperature. This doesn't work from the word go either: I ruin the first plate because I miscalculated the distance between the top of the case and the power supply holder and the cover didn't fit. When trying to break off the excess material, I completely ruin the plate. On a second attempt, however, it works out.
Now to give it some colour. I spray the backside black.
Something's missing. I don't want to leave the aperture black; for some time now, an idea has been bumping around my head. I shall give the Sleeper PC a name. This seems more personal and I won't always have to talk about the «Sleeper-PC». After careful consideration I decide on «Sleepy». You are welcome to insult both me and my unimaginative naming choices in the comments later. But I like it.
A few days ago our graphic artist Sven Mathis saw the dremel lying around and asked me if he should engrave something for me. I told him about my project. He was immediately into it wanted to know which style I wanted the name to be in.
I haven't really thought about that yet. Sven's right: if there's any text, it should at least find Sleepy's style thematically. I show him the AMD Athlon logo on the front panel. Something like that would be great.
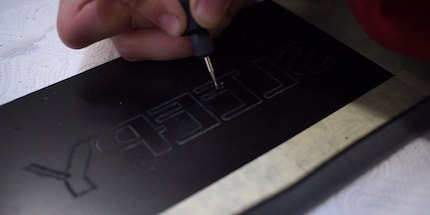
Sven finds an existing font and adapts it slightly. It's based on the AMD Athlon logo decorating the front panel of the housing. He mirrors the engraving on the back of the bezel for a cleaner look. This keeps the front side smooth.
After about twenty minutes Sven is all done. I attach the panel to the bracket and Sleepy's power supply panel is ready.
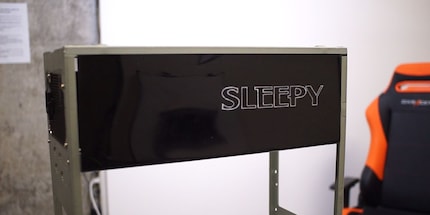
Looks pretty good. For the time being, however, I'll have to remove both the power supply and the bezel. I don't want to ruin the great cover during further work.
In how many scenes can a dremel be seen?
The competition has ended.
From big data to big brother, Cyborgs to Sci-Fi. All aspects of technology and society fascinate me.
Interesting facts about products, behind-the-scenes looks at manufacturers and deep-dives on interesting people.
Show all
Background information
by Kevin Hofer
Background information
by Philipp Rüegg

Background information
by Kevin Hofer