
Background information
Removing image noise: self-proclaimed test winner with grotesque results
by David Lee

RAW converters such as Lightroom have made massive leaps in the last 20 years. As a result, it can be worth re-editing some old photos. I’ll use a few examples to show just how much can be improved.
Still have the RAW originals of old photos? Then it’s worth considering redeveloping them for several reasons. Perhaps you have a different view on what the picture should look like today. Over the years, you’ve probably also acquired a process and better eye, editing images more effectively. The third possible reason is that today’s software simply offers more options and inevitably leads to better results.
Since my first two reasons are subjective and individual, I’ll focus on point three. I dug out some old photos and compared the results with what could be achieved today. I use Adobe Lightroom Classic, so my comparisons will refer to that RAW converter. If you use other software, feel free to run similar tests yourself. This’ll quickly show whether it’s worth the effort to re-edit.
With the current Lightroom, I can edit images as I did in the very first edition. In the Develop module, I can select a Process version in the bottom section, Calibration. This specifies the process Lightroom should use to develop images. Process 2, for example, is the process I used in Lightroom 3 and which is still active for most of my old images.
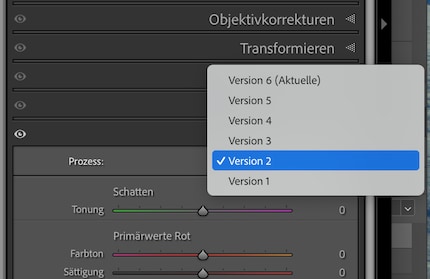
Processes 1 and 2 have different controls in tone value correction than later versions. From version 3 onwards, Lightroom automatically switches to the latest process version as soon as you start editing an image. This isn’t the case with processes 1 and 2 – you have to switch to the new version yourself. Only then will new features be available to you.
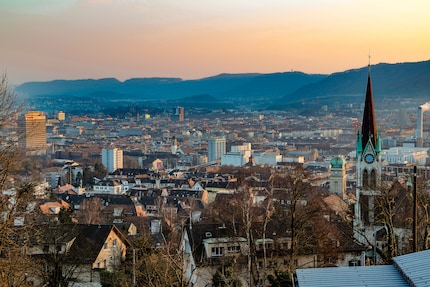
My first test subject is a very ordinary landscape pic: a view of Zurich from Käferberg, taken in June 2008 with my first digital camera, the Nikon D70. Here’s what the image looks like when I open it in Lightroom and save it as a JPEG without editing, i.e. using the default settings.
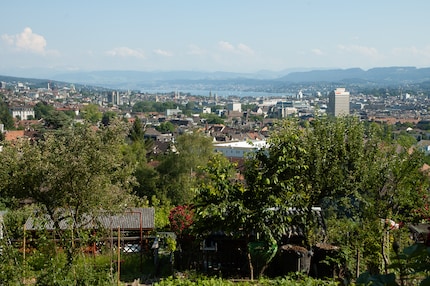
With automatic tone value correction, processes 1 and 2 show practically the same result. There are also no differences between processes 3 and 6. The difference between process versions 2 and 3, on the other hand, is very clear:
Adobe completely reworked its tone value correction between these two processes. Instead of today’s Highlights and Shadows, Recovery and Fill Light are used in process versions 1 and 2. The current White control is missing, instead there’s Brightness. These controllers weren’t just renamed, they also work differently. Same goes for any controllers that retained their name. From version 3 onwards, Blacks appear much more subtle than before.
This also affects any options for manual correction. In process versions 3 and up, I can make finer adjustments and am more flexible at the same time. Adobe has also added a lot of new functions. Something like automatic sky selection is important for landscape photos. More recently, other parts of the landscape such as soil, water or vegetation are recognised as well. The Texture and Dehaze sliders also aren’t yet available in process version 2.
Regarding manual correction, I can only use process 2 to make the photo a little brighter than with auto correction. There’s not much more you can do than that. In version 6, I can draw on the full potential. Since I can edit the sky separately, it doesn’t get too bright and clouds remain clearly visible. At the same time, I can spice up any plants in the foreground even more if I want to. The biggest difficulty for me is not overdoing the editing. This picture no longer looks natural to me; I’m just demonstrating what’s possible.
Despite an exposure time of eight seconds, this picture is still too dark. At 800 ISO it’s noisy too, since I took it with my old Panasonic Lumix LX3 compact camera. Technically, this is a bad shot, but I like the mood. Perhaps reworking things is worth the effort.
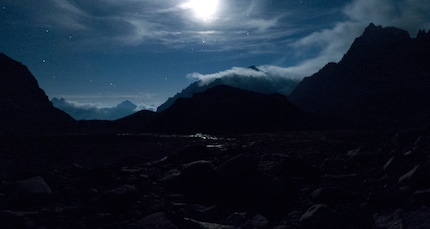
Automatic tone value correction brightens any shadows so that more can be seen in the foreground. Process version 6 corrects more aggressively, simultaneously increasing image noise and colour cast in exchange. Doesn’t look much better to me.
I found intervening manually with process version 2 tricky at first. Since I can’t edit the sky and foreground separately, either the foreground is too purple or the sky is too green. However, this problem can finally be solved using the Color Mixer.
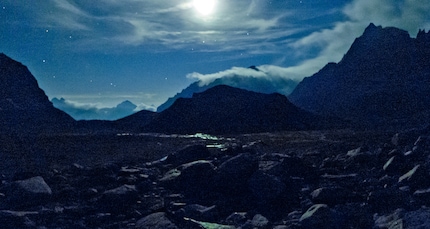
With process version 6, I can’t get the tone value correction to work much better. However, I can activate AI Denoise, which eliminates the graininess very well. However, the image no longer looks like a real photo to me, but more like an AI-generated fantasy image. Pretty annoying, since I took this photo for real and I want it to look real, damn it!
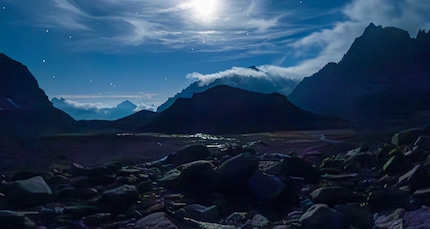
But that’s a me problem. From a technical point of view, the optimisation is impressive.
I took this photo at Zurich Zoo in 2011 with the Nikon D90. Because of the fast shutter speed, it’s completely underexposed – despite high sensitivity at 3200 ISO. Here’s the image with default RAW settings.
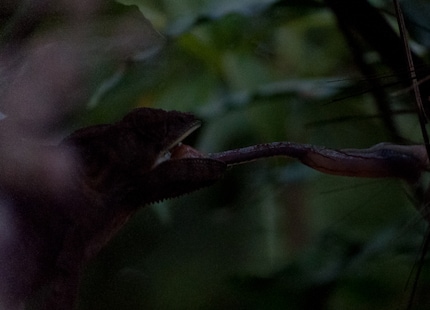
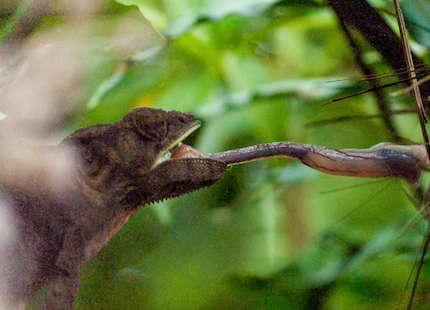
This time it’s the older process version that brightens the image more. There’s bad image noise, and it’s easy to see that the white balance isn’t right. The chameleon is purple instead of brown. Process 6 brightens the photo significantly less, which is better in my opinion.
I can manually correct the purple cast in process 2 and reduce the brightness a little. Under Details, I can set the noise reduction to be a little stronger – but not too strong, otherwise everything will be blurred.

In the current version, I’m again trying out AI Denoise. However, the AI reaches its limits once more in this very noisy image. I can only choose a maximum strength of 30 out of 100, otherwise strange things happen. Even so, the veins in that tongue become far too red; I have to turn down the red saturation after. The orange is also too bright. It takes quite a while until I’m satisfied with the processing – still, the result is significantly better than with process version 2.
In this shot, the camera had to cope with an extremely high contrast. Once again, I used the Panasonic Lumix LX3 compact camera – it was overwhelmed. The question now is, can this image be saved using today’s Lightroom version?
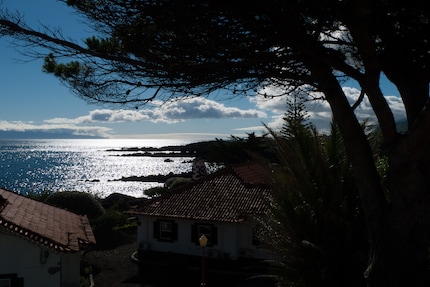
The new process does a much better job with automatic tone value correction. Dark areas are lightened to such an extent that they’re easy to distinguish.
Using the old process, shadowy areas can be lightened even further. Sadly, reflective areas in the water are so overexposed that they can no longer be saved.
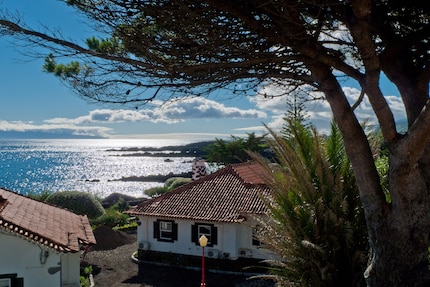
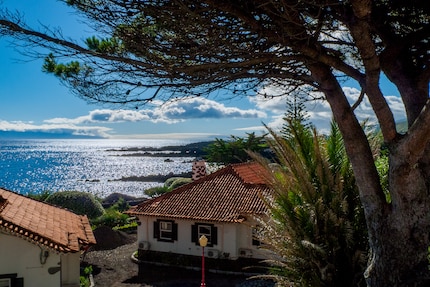
The same goes for the new process version. There, I can edit parts of the landscape such as the sky or water separately. The automatic detection works perfectly. However, glittering areas in the water remain overexposed.
In the first few years of my digital photography journey, I shot almost only JPEGs. Even after 2010, I still snapped using this format very often. As a result, I’m interested in whether JPEGs can also be corrected better in the current version of Lightroom.
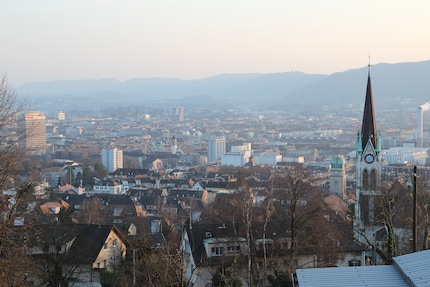
As expected, the automatic corrections are very subtle – the JPEG is already «correct» in certain places. However, the current process version darkens things a little more and makes the view appear clearer.
With process version 2, I can’t achieve a significant improvement manually either. Using the new process version, I can edit the sky separately. This is also a perfect photo for the Dehaze function. Here’s manual processing using process version 6.
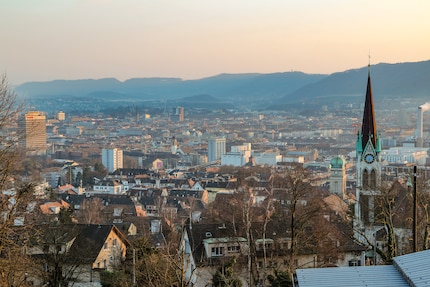
Still, with the JPEG format, I can’t intervene too much, otherwise it’ll tear up the colour gradients in the sky. This can be seen particularly clearly at the top left.
If you edited old RAW images in Lightroom 3 or older, another go-around will bring visible improvements. The tone value correction is much better, and there are also useful features such as Dehaze and more options for local corrections. Since Lightroom 4 or process version 3, Adobe hasn’t made any significant changes to tone value correction. But you can also get even more out of these versions by editing the sky and other parts of the image separately. AI Denoise also makes a difference. However, both features can also make a photo look unnatural if you overdo it. With JPEGs, you have to correct even more cautiously, otherwise image noise and torn colour gradients will get out of hand. However, this can still be worth it for exciting but not optimally exposed shots.
My interest in IT and writing landed me in tech journalism early on (2000). I want to know how we can use technology without being used. Outside of the office, I’m a keen musician who makes up for lacking talent with excessive enthusiasm.
Interesting facts about products, behind-the-scenes looks at manufacturers and deep-dives on interesting people.
Show all