
I have tried to sleeve my cables myself, the result is...
Sleeved cables look damn smart. But they are also very expensive. To save money, I tried it myself. This is the story of my failure.
Slowly I push the cable through the paracord. It. Goes. Not. Forwards. I move the cable what feels like a centimetre per minute. My fingers hurt. My whole body is tense. Sweat is running down the back of my neck. "Move forwards, you fucking cable!" It doesn't want to. No, sleeving is not for me. But I was fully motivated at the start.
The supreme discipline of modding
I look to the right while gaming and see the inside of my PC. I like my colour-coordinated components. What bothers me are the plain black power cables. I've already seen videos of modders sleeving their cables themselves. I want to try that too.
Sleeving refers to the process in which the fat cables of the power supply unit are stripped of their sheathing and put into individual fabric sleeves. The work is described as tedious and time-consuming. Of course, if I really want to do everything myself, I first have to measure, cut, crimp and crimp cables. And that for every single cable for the mainboard, GPU and all other connections. That takes time.
Is cable sleeving the supreme discipline of case modding? Probably not, bending hard tubes or modelling case components requires a more artistic approach. But sleeving is definitely the most time-consuming.
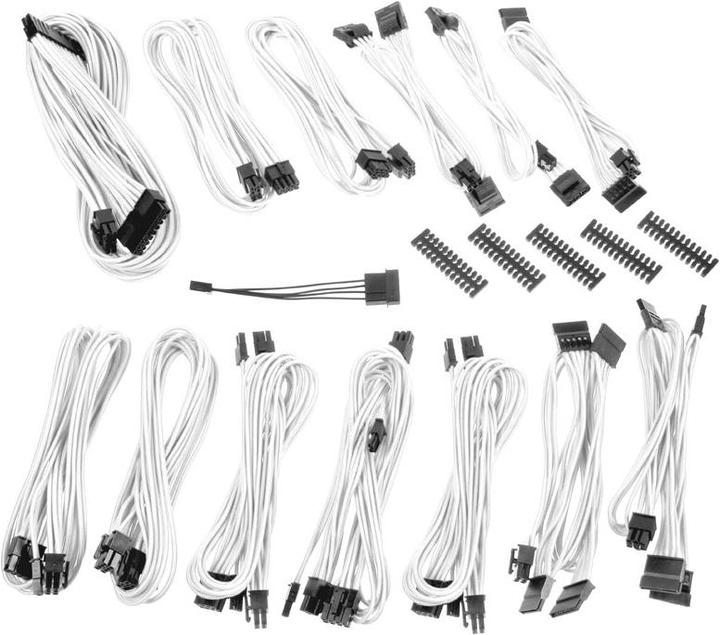
No wonder more and more modders today are turning to pre-sleeved cables or having them made. The selection of different colours is now relatively large. However, they still don't come close to the possibilities of DIY - not even in terms of price.
Almost limitless possibilities
Most modders use parachute lines - known as paracord - as sleeves. These are made of nylon and were first used by the US military during the Second World War. Today, the lines are also very popular with hobbyists and campers. Fun fact: Paracord was even used to repair the Hubble Space Telescope.
Type III paracord - also known as 550 paracord - is used for modding internal PC power cords. The number 550 refers to the minimum breaking load of 550 pounds - the equivalent of 249 kilograms. The cord is available in various plain, camouflage, multi and neon colours as well as reflective and glow-in-the-dark.
My project
In addition to paracord, I also need tools, cables, pins and heat-shrink tubing to create the perfect solution. However, the acquisition costs for this exceed the price of ready-made sleeved cables. I therefore opt for the budget option and sleeve the existing cables from my power supply unit.

So all I have to do is remove the pins from the plugs, sleeve the cables and reinsert them. All I need to buy is the paracord and heat-shrink tubing to fix the sleeves. I don't need a sleeving tool. I want to remove the pins with makeshift tools in the form of Bostich clips.
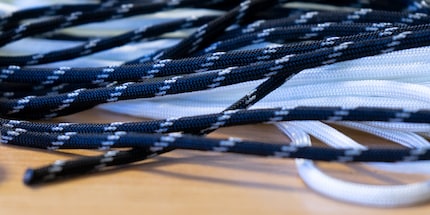
For now, I'm concentrating on the 24-pin mainboard cable, as I already need a lot of paracord for this. If it doesn't work out, I'll be sitting on quite a lot of nylon. A power cable is 60 centimetres long. That times 24 makes 14 metres and 40 centimetres. I order two colours of paracord. 15 metres of white and five metres of black with a glow-in-the-dark effect. That way I have enough material in case something goes wrong - at least I hope so. It costs me around twenty francs with postage plus four francs for shrink tubing. Compared to over 100 francs for a ready-made set, making it myself would cost me a total of 40 francs - if I still make the remaining cables.
Done before I've really started?
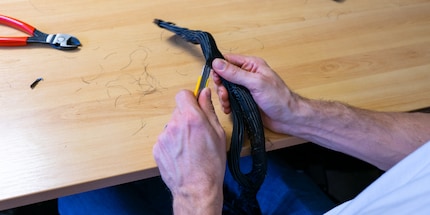
I don't need many tools. A side cutter, a Japanese knife and two Bostich clamps. The first thing I have to do is remove the cables from their existing sleeves. This turns out to be not so easy. The ends of the cables are so strongly glued together that I need not only a Japanese knife but also flat-nose pliers to remove them. I cut them open lengthways with the Japanese knife and then pull them off with the pliers. I'm annoyed as to why it has to be so complicated. My stress level rises to 20 out of 100 possible points.
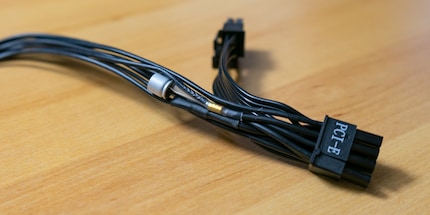
Unfortunately, I come across a capacitor under the sleeve. Can I simply remove the capacitor? How do the manufacturers of sleeved cables do this? If I were to do everything myself now, I wouldn't have noticed the capacitor at all. Stress level 50.
A quick search shows that the capacitor is probably only there to reduce the residual ripple to an absolute minimum. Modern power supplies, mainboards and GPUs all have integrated capacitors to prevent ripple. Nevertheless, I checked with Seasonic. They confirm my suspicions: The capacitor is for optimisation purposes. The power supply should also work without it. Stress level 30, I can take a deep breath. My project is not already over.
I look at the mainboard cable, but there's another problem. Seasonic uses 28 pins on the power supply, as opposed to the 24 on the mainboard. The four additional cables are supposed to check the voltage at the ATX connector. I don't want to and shouldn't leave out the cables for stability reasons. As unfortunately two cables cannot fit through the paracord at the same time, I would have to sleeve the cables individually. But I don't like the look of that. Especially as I can't hide the shrink tubing in the plug. Stress level 60. I decide to leave the mainboard cable for now and think about buying an extension that I can then easily sleeve. The reorganisation helps, my stress level drops to below 42.
New hope with the PCI-E cable?
But I don't want to give up easily. After all, I haven't done any sleeving yet. I'll try the PCI-E cable. It only has eight cables. As it turns out when I undo the existing sleeve, there is also a capacitor in between. In addition, there are further cables going from the first connector to a second connector. I decide to simply disconnect these and only sleeve the primary cable.
Now we can finally get started. As I'm very lazy and have already had to overcome a few hurdles, I decide to only remove the pins on the GPU side. I fix the invisible end of the power supply to the cable with heat-shrink tubing. I label the cables at the end of the power supply unit so that I know which hole they belong in.
I remove the pins with two Bostich clips. I insert them to the left and right of the connector. The pins have barbs on both sides, which are pressed in like this. This should allow them to be removed - at least in theory. Inserting a clip is still relatively easy for me. However, this pushes the pin to the other side and the space for the second clip becomes very tight. It's an absolute fiddle. After a few attempts, I always get the second clip in.
A tool wouldn't have been a bad idea. I kept slipping when pushing the staples in and the Bostich staples drilled into my thumb with relish. After four pins, my thumb is sore and any pressure hurts. My stress level rises again slightly to 65.
Pulling the pins out proves to be more difficult. It takes a surprising amount of force and, after all, I don't want to rip the cable out. The sore thumb doesn't make it any easier. Eventually I manage to remove all the cables from the plug. With a throbbing thumb, I finally start sleeving. The anticipation of this brings my stress level back down to the good old 42.
Cable in a sleeve
The actual work hasn't even started yet and I've already had numerous problems. Now everything just has to go smoothly. I measure the paracord by rolling it up next to the cable. I cut the paracord about five centimetres before the PSU plug. Now I just have to pull the yarn out of the sleeve. It's really easy for a change. Stress level 20, now it can only be good.
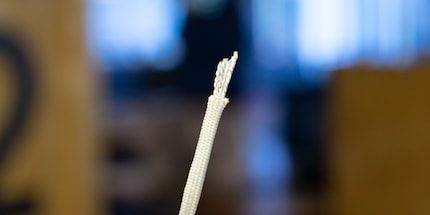
I start with the outer cables on the left and right, which I want to sleeve with white paracord. I tape the pins with insulating tape so that the barbs don't accidentally get tangled in the sleeve. Then I can pull them over the cable centimetre by centimetre. My thumbs hurt, but I'm pleased that everything is going so well.
Once the paracord is over, I cut two heat-shrink tubes, one for each end. I make the tube a little longer on the PSU side, as you can't see it. On the mainboard side, I want to use a technique where the shrink tubing is not or only very slightly visible. I start there because I have to work very precisely.
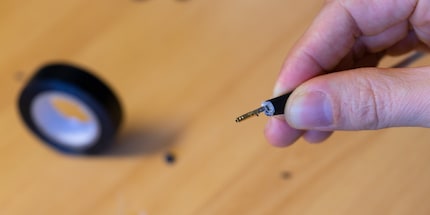
I cut the tube to a length of about one centimetre. I push the paracord slightly over the pin at the lower end and put the heat-shrink tubing over it. Now I heat the upper part of the tube with the blue flame of a lighter. This contracts and fuses with the metal underneath. I press on the still hot shrink tubing and then pull it off. It is no longer visible, but because it has fused with the cable, the paracord holds firmly. Now I'm a bit proud of myself and want to see what it looks like when I reinsert the pin. Stress level zero.
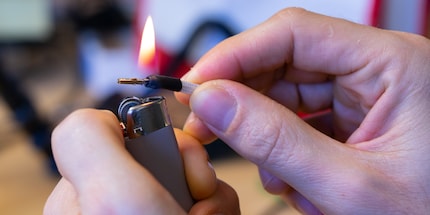
All my pride disappears into thin air. Stress level 50. As the pin was crimped with two cables, it is relatively thick at the lower end where the cables come together. With the sleeve, it is of course even thicker and therefore no longer fits into the plug. I have to mess around so much that the shrink sleeve comes off again. All in vain. I scream inside. I want to cut the damn cable into a thousand pieces. Stress level 99. Take a deep breath, think.
I'm at the end
Now I either have to abandon my plan of making everything as simple as possible and do everything myself: So measure, cut, crimp and crimp the cable. Or I attach the paracord so that the heat-shrink tubing is visible. I opt for the second option because it's starting to stink.
This works perfectly. The outer cables are quickly sleeved. Could it be that everything works now? I can't quite believe it. My fears are promptly confirmed when I start putting the glow-in-the-dark paracord over the cable. In addition to nylon, it must have another, less stretchy material inside. Because although it is 550 paracord, it seems tighter. I barely manage to slip it over the cable. It doesn't move forwards. My thumbs hurt like hell. I cramp up and stare at the paracord, mesmerised. My eyes start to burn. I can't take any more. I'm crying inside from the pain and despair. Stress level 100.
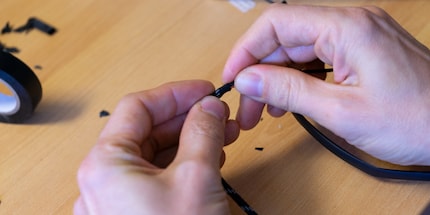
It takes me twenty minutes to slide the thirty centimetres of paracord over the cable. At the very end, I can't go any further. I have to cut the paracord lengthways so that the pin comes out on the other side. Enough is enough, I give up. I don't want to do this to myself again. Now I've been sitting over these damn cables for over five hours and I haven't even managed to sleeve one PCI-E cable. I can't see the damn things anymore. The thought of having to go through the hassle of sleeving a cable through nylon again scares me. My attempt to sleeve cables myself has failed. Perhaps it would have been best if I had tried it properly and done it all myself. But now I don't like that either. Then I'll just buy the fucking cables. Stress level zero
From big data to big brother, Cyborgs to Sci-Fi. All aspects of technology and society fascinate me.
Practical solutions for everyday problems with technology, household hacks and much more.
Show all