
Background information
Keycap Kevin: The Sound of Mechanical Keyboards – Episode 1
by Kevin Hofer

If you want to sit on the sofa whilst gaming with a mouse and keyboard, your options are limited. Below, I’ll show you how to make your own lapboard.
Consequently, I decide to build my own lapboard. All I need is wood, a mouse pad, foam, spray paint, glue, sandpaper and a new wireless keyboard.
My idea is simple. I’ll cut a piece of wood to the appropriate size, then stick a large mouse mat on top of it. After that, I’ll cushion the bottom with foam, so that the lapboard remains comfortable to use, even during lengthy gaming sessions. And hey presto: my lapboard, complete with a mouse and keyboard, is good to go.
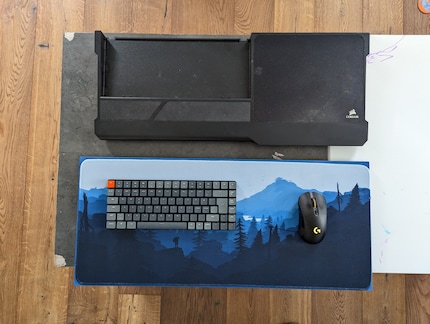
When it comes to the sizing, I use the Corsair lapboard, which measures in at 670 × 52 × 277 millimetres, as a guide. Using these measurements, I go off in search of a pretty mouse pad. Whoever designed the one I chose seems to have brazenly taken their inspiration from «Firewatch». In fairness, though, the Campo Santo design is damn cool. At 700 × 300 millimetres, it’s also only slightly larger than my old lapboard.
Next, I need foam. I opt for a 15-millimetre-thick piece of Visco memory foam, once again using Corsair as a guideline. All that’s missing now is the right wood.
My brother, an amateur carpenter with better DIY skills than me, recommends I go for spruce or birch plywood. It should be as lightweight as possible, so as not to cut off the blood supply to my legs 20 minutes into a gaming session. The salesman at the hardware store, also a member of Team Spruce, immediately cuts me a suitable piece. I add another 5 millimetres on both sides so that the mouse pad can fit without issue.
Before gluing it all together at home, I test the weight. Oof. Heavier than I thought. The scales say the board alone weighs 2.5 kilogrammes. And that’s before I add the keyboard, mouse and mouse pad. Grumbling, I put my craft project on the back burner.
On my second visit to the hardware store, yet another salesman advises me to use spruce. He does, however, say to use glulam instead of plywood. The uncut panel is already lighter than my previous one, so I give it the go-ahead.
At home, I sand the edges and spray the wood with a water-based blue lacquer spray to match the mouse pad. Why water-based? So that I don’t stink out the living room with solvent or pollute the place with chemicals that are harmful to kids.
With a fresh can of glue, it finally works out, and my lapboard is complete.
I’m pleased with my work. The cost of the materials – wood, mouse pad, foam, paint and glue – came to about 60 francs/euros. That’s considerably cheaper than any alternative available to buy – and I can even decide which keyboard and mouse I want to go with it. I could even swap out the mouse pad if I ever get tired of it.
What do you make of my project? Where is there room for improvement?
As a child, I wasn't allowed to have any consoles. It was only with the arrival of the family's 486 PC that the magical world of gaming opened up to me. Today, I'm overcompensating accordingly. Only a lack of time and money prevents me from trying out every game there is and decorating my shelf with rare retro consoles.
Interesting facts about products, behind-the-scenes looks at manufacturers and deep-dives on interesting people.
Show allThe keyboard on my Corsair K63 lapboard is bust. My only means of replacing it is to go for exactly the same model. Unfortunately, these keyboards are no longer on the market – and there are virtually no alternatives. There’s the Razer Turret, but it’s not available in Switzerland, and is pretty expensive to boot. All that’s left besides that, are gargantuan solutions such as these Couchmaster models. These bad boys are for singles – or people with a desire to be single – only.
I could also carve an indentation into the wood so that the keyboard is recessed, like on the Corsair lapboard. That said, I can achieve the same typing height with a low-profile keyboard, which I prefer anyway. It’s only when I’m putting the lapboard away that keyboard slippage is an issue. Until now, I’ve always left it leaning against the back of the sofa. The keyboard should have enough grip for gaming, but I add some Velcro to my shopping list nonetheless. If the need arises, I can use it to attach the keyboard to the lapboard.
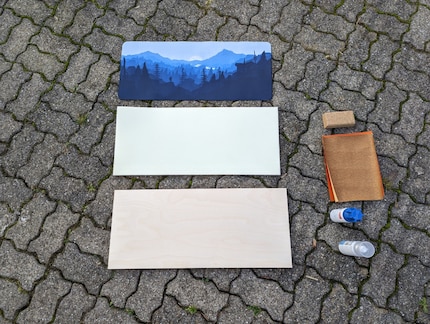
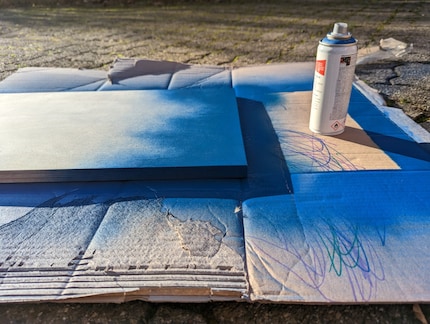
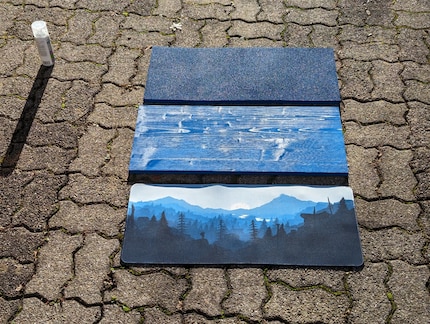
Once the paint is dry, I use liquid glue to stick on the mouse pad and foam mat. Get an adhesive that sticks really well – not one that allows for repositioning as I used on my first attempt. At least for the foam part. I can’t get mine to stay stuck on, even if I douse it with the entire can, Homer Simpson style.
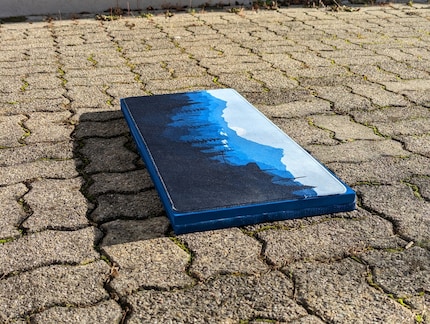
For the keyboard, I went with the Keychron K3, a compact model with mechanical low-profile switches and key caps. Although it only has Bluetooth and no Wi-Fi dongle, I didn’t notice this resulting in more significant input lag, even in online shooters. I only added the Velcro for testing. It’d certainly work – the keyboard stays on, even when the lapboard is tipped forwards. This puts the keyboard at a steeper angle, but even in this position it stays perfectly in place during typical use.

Sharge 170
24000 mAh, 170 W, 86.40 Wh