
Background information
All that glitters is not gold: copper pipes for a custom water cooling system?
by Kevin Hofer
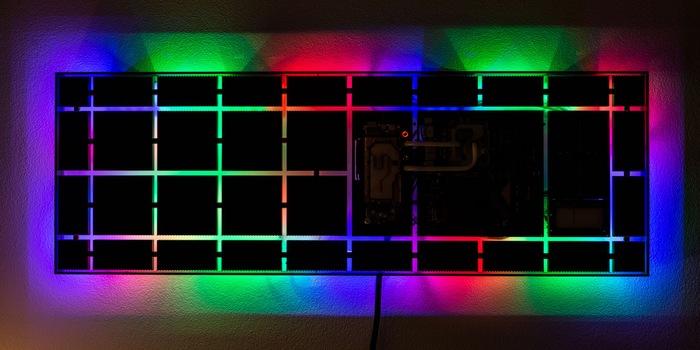
Here's a PC that stands out from the crowd: digitec reader Philipp has built a superlative wall-mounted PC that kept him busy for two years and almost cost him his sanity. This is his story.
"Hello, will there be another gaming setup competition or something similar soon?" asks digitec reader Philipp by email. "I've put together something crazy." He adds a link to his build log on linustechtips.
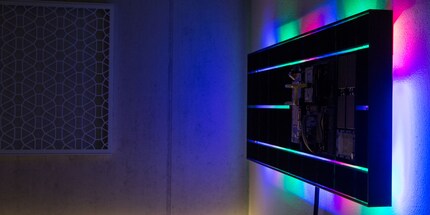
Wow.
I've rarely seen such an awesome, well thought out build - and my favourite pastime is watching PC building porn. Writing back, I'd love to present him with a prize right now. But as we don't have a competition up our sleeves at the moment, I ask him if he's happy for me to write an article about his project. He does, and based on his build log and queries via email, I try to trace Philipp's near descent into madness.
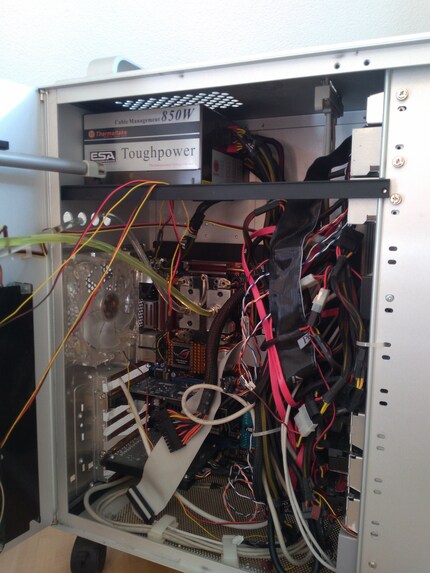
Sometime in 2016, Philipp's PC from 2006 shows the first signs of age. Leaks in the water cooling system and blue screens are the order of the day. He decides to build himself a new PC. As the noise of the fans disturbed him, the PC was to be passively cooled. "At first I wanted to build a PC case with a cooling outer skin. The idea was to make the side walls of the PC from cooling fins, but in such a way that the cooling circuit could be plugged into the side walls. But then I realised that a wall-mounted PC was more appealing in terms of design."
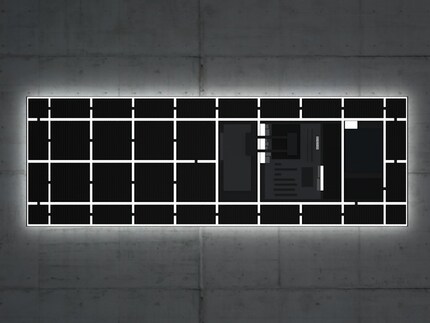
The design is done quickly. "As an architect, I have the expertise in CAD. What's more, the project was still so fresh at the time that I was very motivated." Philipp made his first log post at the end of February 2017. His vision: aluminium heat sinks are mounted on a transparent fibreglass panel. This part acts as a passive cooling system. The components are to be installed on a removable insert on the right-hand side. This means he can easily take his components with him to LAN parties. There he wants to use the insert in a kind of travelling case where the system is cooled with a radiator and fans. The pump and reservoir are also mounted on the insert. These are connected to the copper pipes via soft tubes and dry couplings, which dissipate the heat via the heat sinks.
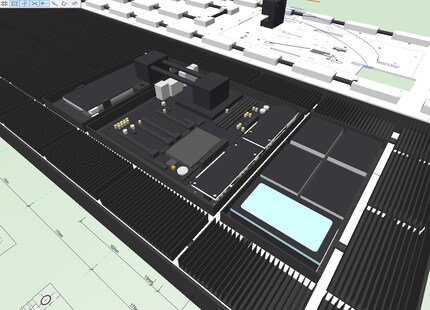
The insert consists of three parts. On the left is the water-cooled graphics card. In the centre section is the mainboard with two fanless power supply units. The right-hand section houses four SSDs and the pump/reservoir combo.
Philipp makes most of the parts himself: He customises the glass back plate, the inlay, the copper pipes, the cooling plates, spacers, wall bracket and even the CPU water block because there isn't one for the mainboard. "I was able to rely heavily on the experience and support of my father, who also has a CNC for metal parts. It wouldn't have worked without him."
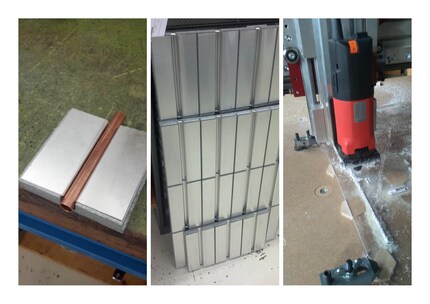
Back in May 2017, Philipp had already made or bought most of the parts. Originally, he wanted to transfer the heat from the pipes to the aluminium cooling elements via solid copper blocks. However, the copper for the heat sinks would weigh 70 kilograms and cost around 1000 francs. Too expensive and too heavy to hang on the wall. The solution is heating plates, which are used in underfloor heating systems. They weigh one kilogramme per square metre and cost 40 francs. The copper pipes are placed in the floor heating plates and transfer the heat to the aluminium heat sinks via guide plates.
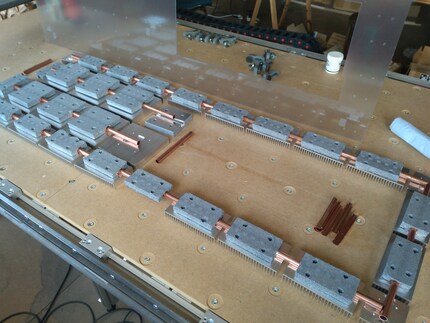
Philipp has a lot to think about. To keep the construction as thin as possible and because the fittings are wider than the copper pipes, he has to mill pockets into the heat sinks along with threaded mounting holes. This is the only way to ensure that the heat sinks lie flat on the floor heating panels. In June 2017, Philipp milled the glass back plate and in August of the same year, he mounted the heat sinks on it for the first time. After that, the wall PC log is quiet for a long time.
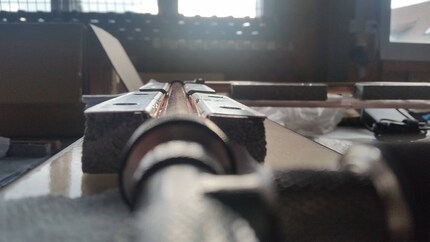
In December 2018 - over a year after his last log post - Philipp reports back and explains what has happened in the meantime. He completes the cooling system. As standard copper pipes do not fit perfectly into the floor heating panels, he has manufactured copper parts so that the pipes fit securely and dissipate heat better. When installing the anodised aluminium heat sinks, it turns out that the height of the copper pipes does not disappear completely into the underfloor heating panels. This means that the heat sinks do not lie completely flat on the heating plates. He therefore milled a groove into the back of the heat sinks. Now they lie flat and he can mount everything on the fibreglass plate. This means he always has to deal with problems.
"I built it in my father's shop, where my CNC is also located. As it's about half an hour by car from my home, I can't just spontaneously go there to tinker for an hour. I often ran into problems, had to order parts, give parts to be anodised or wait for something else. And then I'd lose interest in the meantime because it was so tedious. It was so much work."
Philipp also assembles the insert with the three parts and installs the components on it. Despite all the planning, some tinkering is required here and there. He can only use one screw to attach the graphics card. Without further ado, he converts the cooling block spacers: the graphics card rests on these and is held in place from above by the one screw.
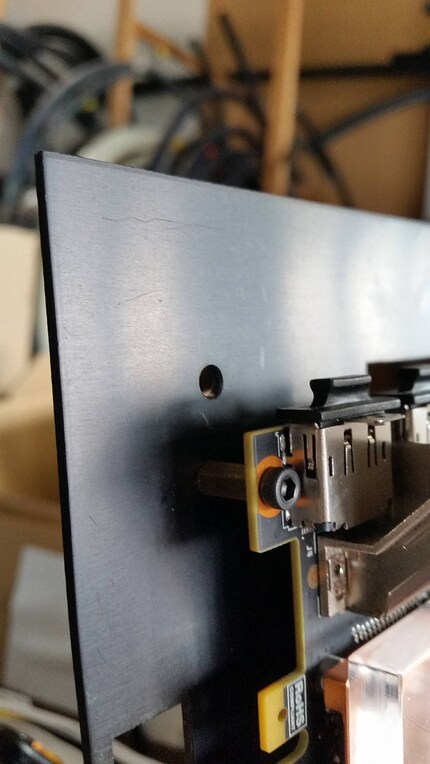
"The biggest challenge was to ensure that everything fits together and fulfils my design requirements. For example, I didn't want the HDMI cable to be visible from the front. So I sourced a cable that is actually for drones, only two millimetres of which would have been visible. The problem: Unfortunately, it cannot support 60 Hz at 4K. I then tried three other HDMI cables, only to switch to Display Port in the end because it didn't work. The plug still annoys me a lot. It just doesn't look nice."
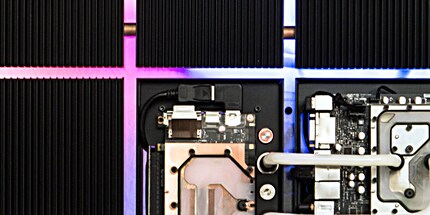
When I read Philipp's entries on cable management, I am reminded of many hours of cable management. I can literally hear him swearing when a cable doesn't fit. I can also relate to his entry on bending the acrylic glass tubes for the visible part of the water cooling system:
"I'm focussing on finally finishing the project. I've become a little less picky over time and I'm happy even if something isn't 100 per cent right. The last five per cent of a project are always the hardest."
In March 2019, the time has finally come: the insert with the components in the cooling system is installed. But then comes the final major setback: the PC boots up, but does not achieve the desired performance in the Furmark stress test. Philipp suspects a hardware problem. After months of testing and despair, he then finds the solution to the puzzle - in Furmark itself: He had accidentally run the benchmark at a higher level than intended. That's why he didn't achieve the desired result.
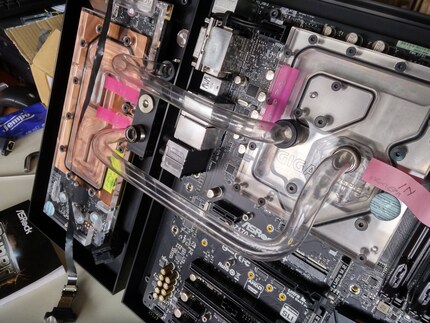
In October 2019, the PC finally runs - and how. Despite passive cooling, the CPU only got a little over 80° Celsius after 90 minutes in the simultaneous stress test with Furkmark and CPU Burner. The GPU doesn't even reach 60° Celsius.
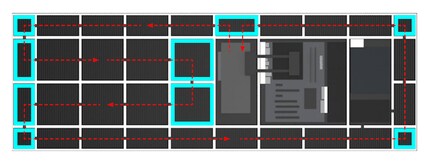
The images from the thermal imaging camera clearly show that certain heat sinks do not get any hotter than the ambient temperature. This is because he was unable to attach the floor heating panels to them. These heat sinks are therefore only for visual purposes, they do not dissipate any heat. Around a quarter of the cooling surface is not needed. This makes the good values achieved by the wall-mounted PC all the more astonishing.
It is estimated that Philipp has invested over 500 hours of work and around 5,000 francs in his wall-mounted PC. "When you're up to your neck in a project, do you think: 150 Swiss francs for anodising? Yeah eh! HDMI drone cable that's only available on Amazon America and I need a forwarding address in Florida for it? Costs 100 quid? Sure! Not that I have the money lying around, but when you've been working on a project for over a year and it's 70 per cent finished, sometimes it doesn't matter. You just want to get it finished. I didn't do any bookkeeping anyway."
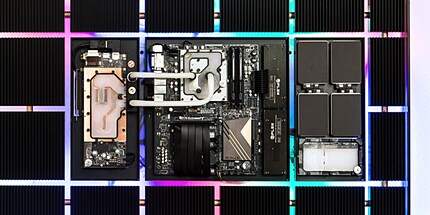
Philipp now plays "The Witcher 3: Wild Hunt" on his wall-mounted PC. "My components from 2017 are perfectly adequate for this. My aim was never to build a power monster, but rather a designer PC that is virtually silent. So it doesn't bother me if the performance is no longer top. The PC has external values!"
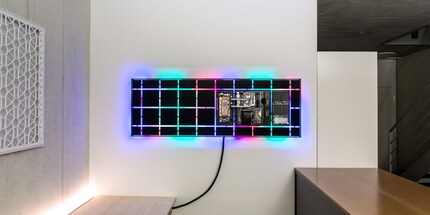
Philipp has now given up on the removable inlay for LAN parties - too much effort. Nevertheless, the inlay is practical for accessibility. Although he is proud of the fruits of his two years of labour, he wouldn't tackle a project like this a second time.
"I've built up such a love-hate relationship with the part. It's really cool, but I'm so sick of it. If there's ever a fault, I'll throw it out of the window. That thing has almost driven me out of my mind."
PS: All images and videos are by Philipp.
From big data to big brother, Cyborgs to Sci-Fi. All aspects of technology and society fascinate me.
Interesting facts about products, behind-the-scenes looks at manufacturers and deep-dives on interesting people.
Show all
Background information
by Kevin Hofer

Background information
by Kevin Hofer

Background information
by Kevin Hofer