
Cutting my own Star Wars Galaxy
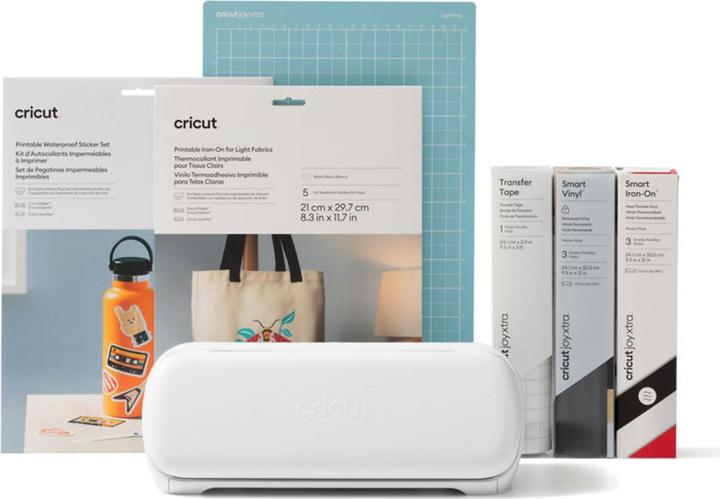
I had the idea of creating my own stickers and Christmas cards so I decided to give the Cricut Joy Xtra a go. With this smart cutting machine I was able to cut my own Star Wars Galaxy out of adhesive foil and cardboard.
There’s plenty of cheesy Christmas cards in the stores. But a card with a Star Wars theme is more difficult to find. It’s best if I make one myself. I use the Cricut Joy Xtra crafting and cutting machine to help me.

I can program the machine with a software called Design Space. The machine then uses a fine blade to cut out a design from vinyl, cardboard, foil or other materials. With a little patience and a willingness to experiment, I can do a lot with this machine.

Source: Michelle Brändle
The Cricut Joy Xtra and its possibilities
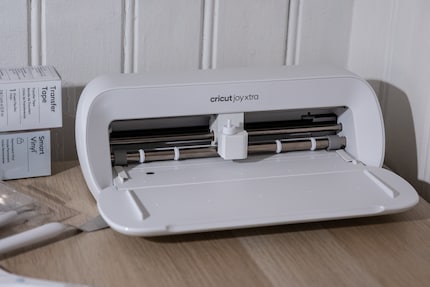
The cutter itself is quite space-saving. It measures just 30 × 15 × 10 centimetres. For some projects, however, you’ll need to use a cutting mat and you should allow space at the back for this too.
Mats are available in various sizes. One for A4-sized projects is included in the package. There are also longer mats for lettering, for example. However, the width has a maximum of 21 centimetres.
Source: Michelle Brändle
At first I’m unsure how I, a newbie, will manage with the machine. But Cricut doesn’t leave me stranded. Once I’ve installed the software and connected the Cricut Joy Xtra via Bluetooth, I get all the instructions I need. The machine practically calibrates itself with my assistance and shows me that everything is set correctly by doing a test cut with the Cricut logo.
If you have absolutely no ideas to start with, you’ll find courses and inspiration on Cricut’s website. Some are free, others require you to purchase a membership.
Star Wars vinyl stickers for my Macbook
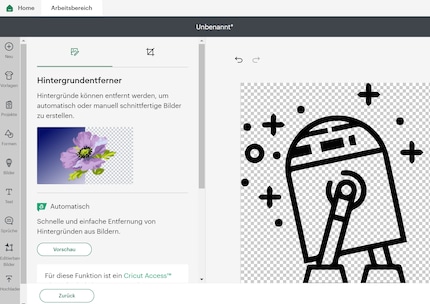
The first thing I do is make my own sticker galaxy with the Cricut Joy Xtra. I’ve been wanting to give my Macbook a facelift for a long time. As I can also process my own images in Design Space, I draw a silhouette of R2D2 and BB8. In Cricut’s Design Space software, I can load the image and convert it into a vector graphic. This works pretty well for such a complex image. Some edges and circles aren’t quite perfect, but that doesn’t bother me.
You then upload it directly to the cutting machine. If I want, I can upload it directly to a Cricut cloud. I can then access my projects from anywhere and edit them via my Android phone or Apple device, for example.
Source: Michelle Brändle
I then place the image on the workspace in the software and resize it so that it’s a good size for my Macbook. This works easily with drag and drop. When I reduce the figure, the size (in centimetres) is displayed directly at the edges. Then I click on the «Create» button.
In this step, I select vinyl foil because this is the material I want to cut my droids from. This is important for the Cricut Joy Xtra to know how deep to set the blade. Namely so deep that it only catches the material and doesn’t cut through the entire mat. Almost anything goes, from thin paper and artificial leather to foils and thick cardboard up to 270 g/m². You can find a more detailed list here.
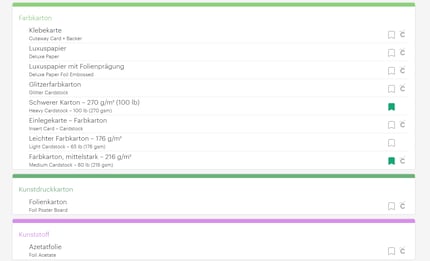
Source: Michelle Brändle
Now I can place the vinyl film on the cutting mat. The mat is slightly sticky to prevent the material from slipping when cutting. It’s practical, but sometimes hairs get caught in it. So I stick the protective film (that I previously removed) back on when I’m not using it.
Then I place the mat in the machine and press the «Start» button in the software. As soon as the Cricut Joy Xtra is finished, it whistles merrily – almost like R2D2. This rather complex sticker measuring 8 × 12 centimetres takes around three minutes. With the last click on «Eject», the Cricut returns my project.
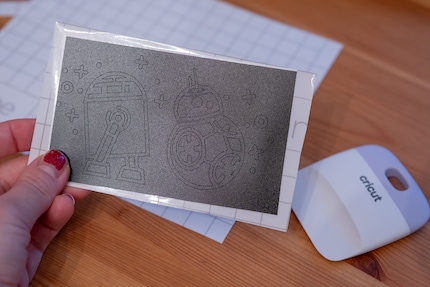
Source: Michelle Brändle
So far so good, but the tricky part is yet to come. The result: quite a few individual parts. I don’t want to undo them by hand and laboriously patch them up on the Macbook. Fortunately, Cricut thought of this and included a transfer tape. By the way, that’s not to be confused with transfer foil, which is intended for decorating fabrics. I cut the transparent adhesive film to the size of the design and stick it over it. This should be done carefully to avoid air bubbles. I press the foil evenly with a plastic scraper.
What I have to do is remove the empty spaces first – that is, what’s not part of the design. I try it with a pointed tool – one from Cricut in this case. A thick sewing needle would also work.
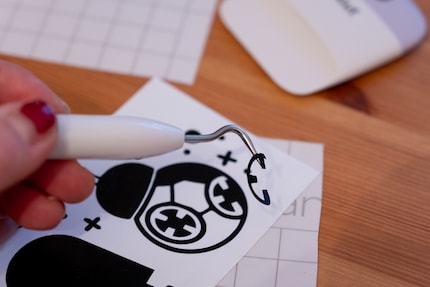
Source: Michelle Brändle
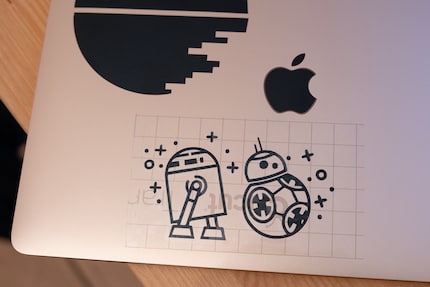
Source: Michelle Brändle
Once I’ve pressed it down firmly, I can remove the film and the design from the mat and place it on the Macbook. Again, I press everything evenly with the plastic tool and peel off the transfer foil. This actually works relatively well. For parts that are still stuck to the foil, I repeat the process until everything is where it should be.
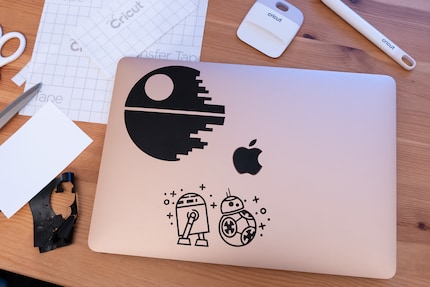
Source: Michelle Brändle
The second sticker I want is a Death Star. I have to be a bit more careful here so that there are no more air bubbles between the laptop and the sticker. I takes me two attempts until the sticker is nice and flat.
Merry Sithmas: Star Wars Christmas card
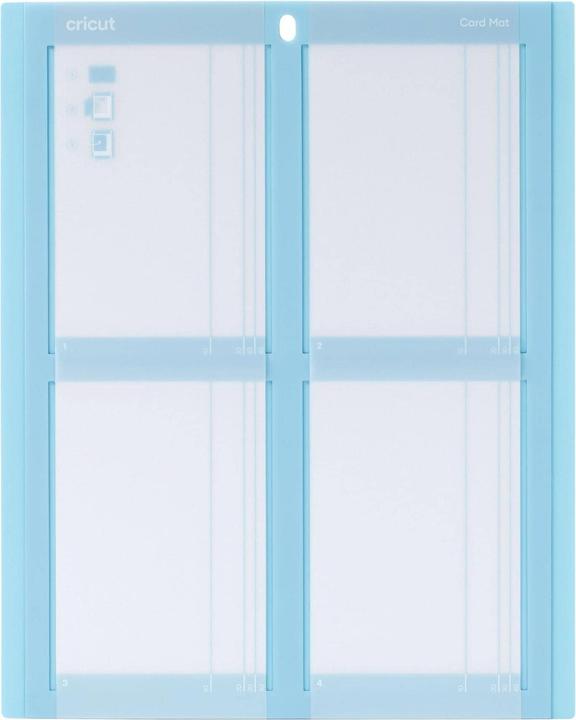
I find the card mat, which I can use to create my own greeting cards, a useful addition to the Cricut Joy Xtra. This is also a cutting mat, but double-walled with a slot. I put the bottom side of the card in there so that only the front is cut through.
I have a go at making at a Star Wars card. I think the size restriction is a shame. The mat has space for cards measuring a maximum of 13 × 17 centimetres. I often make A5-sized cards, which are just a few centimetres too big.
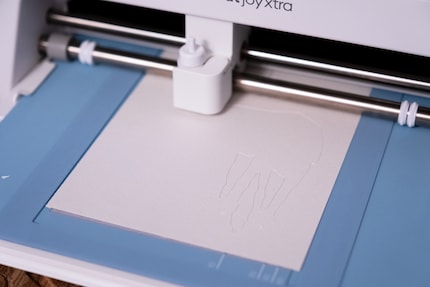
Source: Michelle Brändle
It’s also difficult to set the correct thickness in Design Space, even if it’s indicated on the box. This is because the blade isn’t always correctly calibrated. The first time I use it, the machine doesn’t cut all the way through and I can’t remove the shapes. On my second attempt, I set a cardboard that was too thick and now I have to live with the fact that a fine imprint of my design will always be visible on the mat.
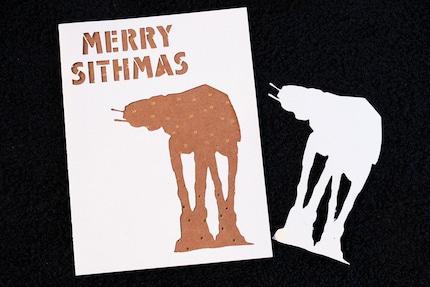
Source: Michelle Brändle
Tip: if the blade doesn’t cut nicely anymore, it could be worn and blunt. Replacement blades are available in this case..
Colourful stickers with a printer and Cricut Joy Xtra
Finally, I try out the sticker paper from Cricut. This should make it possible to create glossy foiled and even colourful stickers. However, I also need an inkjet printer for this.
First I paint the designs in another program and upload them to Design Space. I then define that my project should first be printed and then cut. Now I get the first big disappointment. During the final print the designs are smudged. To be more precise, it’s the black colour that produces very blurred lines. Even with various paper and quality settings, it doesn’t improve.
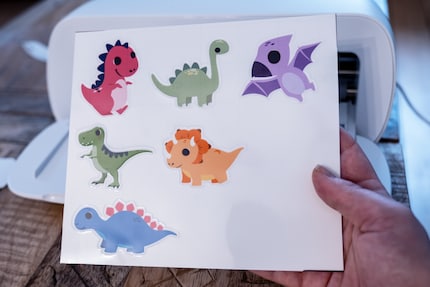
Source: Michelle Brändle
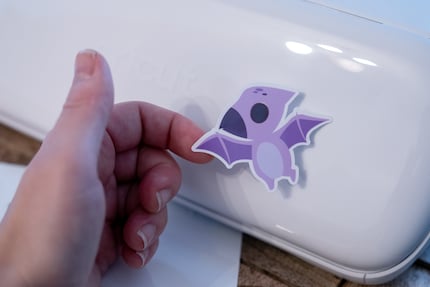
Finally, I’m going to try a project from Design Space with less black: a couple of cute dinosaurs. Things look much better here. After printing them, I have to stick a transparent film included in the sticker set onto the sticker sheet. Once again, you need patience and care to ensure that everything sticks evenly and there aren’t any air bubbles.
Source: Michelle Brändle
With the help of the software, the Cricut Joy Xtra now knows where to cut the printed designs along the line. This works relatively well in my example. Only on the Tyrannosaurus does the blade cut a little too deep and almost separates the sticker from the paper. Apart from that, I’m very happy with the result and will be using these cute dinosaurs to embellish the cutting machine and my mobile phone.

Source: Image: Michelle Brändle
My verdict: a lot of options require a lot of patience
After the initial tests, I implemented a few more ideas with the Cricut Joy Xtra. From jam labels to birthday cards. Transferring the materials definitely requires a steady hand and sometimes several attempts. You also need to learn which designs are best suited for what. Things didn’t always go according to plan for me. For example with the colourful stickers, I had to fall back on a project from Cricut instead of being able to implement my own.
If you’re patient and willing to experiment, I can recommend the Cricut Joy Xtra. It’s fun to implement ideas and prefabricated projects. The software guides you and tells you step by step what to do. There are also lots of courses and explanatory videos if you want to delve deeper. Many of them are even free of charge. This allows you to implement a wide variety of ideas.
Cricut has countless materials for handicrafts. But cardboard boxes and papers that I have at home also work. However, you have to set the machine to exactly the right material so that the cutting depth is correct.
The Cricut Joy Xtra itself is affordable. And the films from Cricut don’t cost too much either. You pay one franc or euro for vinyl stickers measuring 11 × 11 cm.
I still have loads of ideas bubbling away. Maybe next I’ll give the iron-on foil a try. This can be used to personalise shirts and bags. Or I could continue my Star Wars Galaxy with wall stickers that glow in the dark.
Header image: Michelle Brändle
Ever since I learned how to hold a pen, I've been doodling away in bright colours. Thanks to my iPad, digital art has also become part of my life. That's why I love testing tablets – from the graphic design range to the regular kind. When I feel the urge to express my creativity without lugging lots of equipment, I go for the latest smartphones and start snapping away.
These articles might also interest you

Product test
Portable printers – because photos you snap on your phone deserve a moment in the spotlight
by Michelle Brändle

Product test
Milling, printing, engraving: Is the Snapmaker the all-in-one solution?
by Kevin Hofer

Product test
Elevate your desk with an adjustable monitor stand
by Darina Schweizer
