Build an automatic smoke machine at the door
We allow ourselves a joke. Whenever a door opens, the person entering or leaving should be fogged by a smoke machine. Do you want to be able to do that too? Or do you want to make a film-like appearance every time you come home? We'll show you how.
The Touch Board from Bare Conductive is actually quite cool. Especially because it comes with a lot of very specific accessories. Among other things, there's the electrically conductive paint, which we don't know where else to get. It's probably not that difficult to find, but it's handy if we can just get it included.

What can you do with it? All sorts of things. Manufacturer Bare Conductive doesn't provide any operating instructions, but has published some initial building projects on its website that can be recreated. With children
.
Well...
We can do better than that.
"Yo, I've got a smoke machine here," says Product Manager Quentin Aellen, a passionate hobbyist in his spare time.
Better
The plan:
- We build ourselves an automated smoking machine
- We mount the whole setup on a door in the office
- Our employees get fogged
- ???
- Profit
The setup
In addition to the touch board, we use the following components for this construction project.
I would also like to say up front that neither Quentin nor I are experts in electrical engineering. We are hobbyists. So if you can think of any important safety tips or notice any major errors, please let us know in a comment. Technical background knowledge is also in short supply in our lab, which is actually a sofa where others sometimes eat lunch.
The fog machine
The fog machine is activated from the box by pressing a button. This is a normal switch, comparable to a light switch or other button. You press it, the contact between the power and the machine is established and smoke comes out of the machine
.
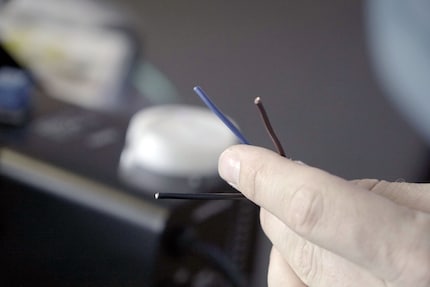
One cable here is the grounding, which we tape off as a precaution so that there are no open contacts
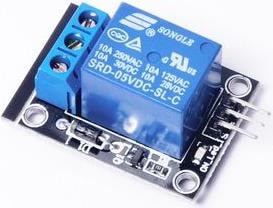
Because the button is too old-fashioned, we unscrew it and plug the cables into a relay. Simply put, this relay will press the button as soon as it is supplied with power. The logic looks like this
Door opens → Power flows from touch board → Relay is activated → Smoke
To do this, we have to change the entire mechanism of the smoke machine. So button off, relay in.
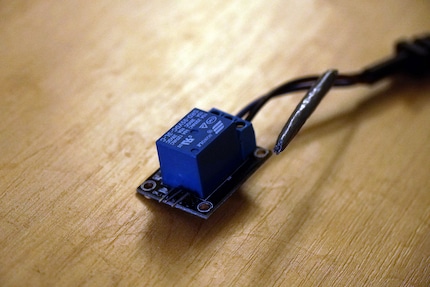
To do this, we make sure that the smoke machine is not connected to the power supply and then unscrew the push button. Remove the cables that are connected to the push button mechanism. This is all very easy.
Since only two cables can be installed in the relay, but the button has three, we need to find out which cable is the earth. Because this is not needed to close the circuit. We masked the earthing with armoured tape. Seems safe enough to us.
This completes the modifications to the fog machine. If you were careful with the button, you can easily return the fog machine to its original state.
The touch board
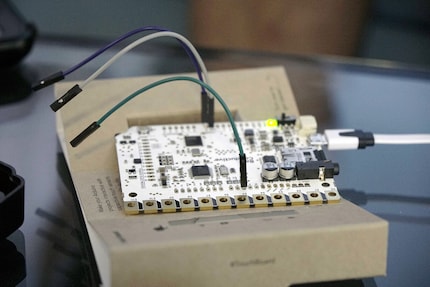
The touch board itself has a very simple design. Choose a pin to which you want to attach the clip that will activate the relay and memorise the number. There's nothing more to do here.
We then load the code directly onto the touch board via the USB connector and that's it. We have chosen pin 10. Any pin will do, but pin 10 is specified in the code, which is why we thought "Yes, that's fine".
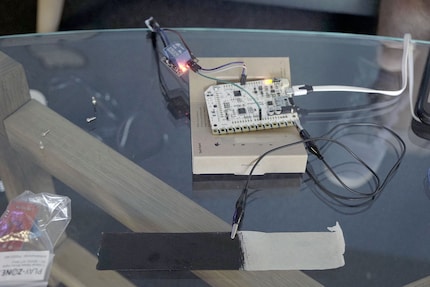
We applied the black conductive paint to a roll of painter's tape. Fortunately, brushes are included in the starter set, but we had to buy the painter's tape separately. Then a clip on the tape and the thing is ready for use.
Up to this point, everything was relatively simple. The difficult part was the code. Because when building the hardware, we simply had to replace the speaker on the setup with the relay construction and that was it.
The code

Since we are not only hobbyists but also lazy, we go through the building instructions on Bare Conductives website. Is there anything we can easily adapt? Because sure, with enough time and employees we could easily write the code ourselves, but if there's already something there that we just need to adapt, then that's better.
Wanted? Found!
The original tutorial plays an MP3 file on a speaker when the code detects the proximity of an object. In the video, this is a hand. In our case, it's the door.
A look at the code shows: It works.
The touch boards from Bare Conductive are essentially Arduino minicomputers. They therefore accept code in the languages C and C++. The code we use is written in C++, but that doesn't mean you have to be the greatest coder ever. Quentin and I managed to do it in an afternoon, then got ambitious and invested another afternoon, but that didn't achieve much. Nothing, to be honest.
Originally, we chose a code that reacts to touch. But that was a mistake, because the door doesn't touch the threshold. But because we were already working on it, we continued to work with the code snippet. Our big problem was that we wanted to create a loop that had the following function: Door open → Two seconds of smoke → Off. The reason for this is that the door is open for about ten seconds whenever someone enters the office. That would be a bit too much smoke. We're afraid of setting off the smoke alarm in the corridor. Then the office would have to be evacuated and we'd get swatted down by the boss.
To achieve this, we wanted to create a loop. In programming, a loop is a command that is executed several times in succession. And it can look like this:
int test () {
   // Declare the variable. It counts for us until variable i reaches the value 20:
   int i = 10;
// While the loop is working while( i < 20 ) { cout << "i is currently at: " << i << endl; i++; }
return 0; }
The code above would output ten lines of text: "i is currently at: " followed by 10, 11, 12 and so on, as i++ increases the value of i by 1 after each line of text. This continues until i = 20. Then the loop ends and that's it.
We wanted something along these lines for the smoke machine. Something like this:
int test () {
   // Declare the variable. It counts for us until variable i reaches the value 20:
   int i = 10;
// While the loop is working while( i < 11 ) { digitalWrite(CH10, LOW); delay(2000); i++; }
return 0; }
We still don't know exactly why our loop project didn't work. The snippet above is not from the code we tried, so it's quite possible that I've just solved the problem. But probably not, because it seems to me that I need to set i back to 10 somewhere. But that would trigger the loop again and we'd be trapped in the loop indefinitely.
If you can make it so that we can make two seconds of smoke via the loop, then please write us the code in a comment below.
Our solution is a little simpler. It works on the code side, but the implementation has a few quirks.
// reading reads the distance between the object and the electric colour
int reading = MPR121.getBaselineData(ELECTRODE)-MPR121.getFilteredData(ELECTRODE);
if (reading < 20) { digitalWrite(CH10, LOW); // LOW = machine on delay(2000); }
if (reading > 20) { digitalWrite(CH10, HIGH); // HIGH = smoke machine off } }
You can read the entire code in our GitHub repository.
The pitfalls of practice
The setup works. Maybe it's not the most secure setup ever and the code seems a bit shaky. It works, but we are ultimately sure that it could be solved better. But what we didn't expect was the reality.
The installation on the door was easy, as was the cabling with the cable reel. Then the lighting conditions come into play. Every cloud, every light that is switched on or off, every person who walks past the door changes the light and therefore the measured value of our setup. The result: random smoke every now and then. But as a compensation: no smoke when there should be smoke.
This could easily be adjusted in the code. In the snippet above, this is the number 20, so if you want to implement the project on your door, this is the value you should play around with to find the best possible result.
Small side note: Most smoke detectors should remain unaffected by the smoke from the smoke machine. Should.
Furthermore, dear reader, I already know you a little. You're probably asking yourself "And what's the point of this now?" Simple.
We did it because we can.
At the end of the day, we gave our employees a foggy, hearty laugh and I wrote a text. Not only did we brush up on our C++ skills with this tinkering, but we also made our employees' - and hopefully your - everyday lives a little more fun.
Now it's your turn: do something! Have fun!
You might also be interested in this
Journalist. Author. Hacker. A storyteller searching for boundaries, secrets and taboos – putting the world to paper. Not because I can but because I can’t not.
From the latest iPhone to the return of 80s fashion. The editorial team will help you make sense of it all.
Show all

